Have you ever experienced that frustrating moment when your Chamberlain garage door opener decides to act up? Maybe your remote control stopped working, or the keypad isn’t responding to your PIN. Before you call for garage door repair or consider buying a new unit, take a deep breath.
Often, the solution is much simpler than you think: a quick reset. Resetting your Chamberlain opener can clear glitches, erase old codes, and get your system back in sync in minutes. This comprehensive guide will walk you through everything you need to know about how to reset your Chamberlain garage door opener, from understanding why a reset might be necessary to executing various reset methods and troubleshooting common issues.
We’ll also cover how to program a Chamberlain garage door remote or keypad after a reset, ensuring you regain full access to your garage.
Why Reset Your Chamberlain Garage Door Opener?
A reset for your Chamberlain garage door opener isn’t just a last resort; it’s often the quickest and most effective way to resolve common issues without professional help. Think of it as a quick reboot for your home’s entry system. Various scenarios can prompt the need to reset a Chamberlain garage door opener, from minor electronic hiccups to significant security concerns. Understanding these triggers can help you decide if a reset is the right first step.
Here are some of the most common reasons homeowners find themselves needing to reset their Chamberlain garage door opener:
- Lost or Stolen Remote Control: This is a major security concern. If a remote control goes missing or is stolen, anyone with it could potentially access your garage. A soft reset can quickly wipe out all old rolling codes, making the lost or stolen device useless and giving you peace of mind. You’ll then need to program a Chamberlain garage door remote, specifically your new or existing ones.
- Keypad Not Accepting PIN: Imagine typing in your secret code on the keypad, and nothing happens, or the door keypad just flashes. This can be incredibly frustrating. While a full factory reset is often needed here to re-pair the keypad, a soft reset might also help clear minor glitches.
- Opener Light Blinks, Door Won’t Move: This is a classic sign of an issue with your safety sensors. The door opener light might blink rapidly, often 10 times, indicating a misalignment or obstruction in the sensor’s path. A soft reset can be effective after you’ve realigned these crucial safety sensors.
- myQ App Shows “Offline”: In today’s connected homes, the myQ app is a convenient way to monitor and operate your garage door. If the app shows a red cloud icon and says “offline,” it usually points to a Wi-Fi password change, a router replacement, or a memory corruption within the Chamberlain opener itself. A specific Wi-Fi network reset through the myQ app menu is your best bet here.
- Power Surge After a Storm: Thunderstorms can be beautiful but disruptive. A sudden power surge or flicker can cause your Chamberlain garage door opener to lose its programmed travel limits, meaning the door travels half-way then reverses. A soft reset followed by a limit re-teach can help your Chamberlain opener relearn how far to open or close.
Real-World Scenarios for Resetting Your Chamberlain Garage Door Opener
Let’s look at a few examples to illustrate these common situations:
- New Tenant, Old Codes: “I just moved in and the garage opens with any remote the neighbors found in the junk drawer.” This homeowner’s concern is valid. In this case, a soft reset clears every stray code, providing a clean slate before new remotes are handed out. This simple action removes unauthorized access to your garage.
- DIY Smart-Home Upgrade: You’ve just upgraded your home network, perhaps swapped routers or enhanced your security to WPA3. Now, your myQ app can’t connect to the Chamberlain opener. A network reset is essential to wipe the old network information, allowing you to pair your Chamberlain opener with the new Wi-Fi credentials. This ensures your myQ technology continues to provide seamless control.
- Seasonal Power Cuts: For many, the first summer thunderstorm brings flickering power. When the electricity returns, your Chamberlain garage door opener might “forget” its travel limits. A quick soft reset combined with a limit re-teach restores smooth operation without needing more involved garage door repair. As Mike G., a Kansas City homeowner, experienced, “I thought the motor was dead, but a six-second hold on the Learn button fixed everything”.
The bottom line is clear: if your indicator light blinks oddly, your keypad ignores you, or your remote control acts flaky after a storm, a reset is often the most cost-effective troubleshooting step you can take. It’s a quick way to restore functionality and regain control over your garage doors.
Understanding Your Chamberlain Garage Door Opener: The “Learn” Button
Before you reset your Chamberlain garage door opener, it’s helpful to understand a key component: the “Learn” button on the motor unit. This little button holds the key to your opener’s radio frequency, memory size, and compatible remotes. Its color tells you a lot about your specific Chamberlain opener model.
Importance of the Learn Button Color
The color of the “Learn” button isn’t just for show; it’s a critical indicator of your Chamberlain garage door opener model’s generation and technology. Different colors correspond to different radio frequencies and security protocols, which in turn dictate which remote controls and keypads are compatible with your garage door.
| Learn-Button Color | Model Years | Radio Frequency | Remote Limit | Notes |
| Yellow | ≈2011-Present | Tri-Band 310 / 315 / 390 MHz | 40 devices | Uses Security+ 2.0 rolling code. Stays in programming mode for three minutes. |
| Purple | 2005-2011 | 315 MHz | 20 devices | Early MyQ-ready units. Same six-second reset hold. |
| Red / Orange | 1997-2005 | 390 MHz | 10 devices | Accepts legacy keypads and remotes only. |
| Green | 1993-1997 | 390 MHz (fixed code) | 8 devices | Pre-Security+. No MyQ support. Same reset timing, but older logic board. |
Let’s break down what each color signifies:
- Yellow Learn Button (2011-Present): These are the most modern Chamberlain models. They use a Tri-Band frequency (310/315/390 MHz) and feature Security+ 2.0 rolling code technology. This advanced security feature means the code changes after every open/close cycle, making it incredibly difficult for “code-grabber” hacks. Yellow-button boards can shuffle through 100 billion combinations. They also boast a generous limit of 40 devices, meaning you can program a Chamberlain garage door remote, multiple remotes, Chamberlain keypads, and other accessories. When programming, these Chamberlain openers stay in programming mode for three minutes, giving you plenty of time to add accessories.
- Purple Learn Button (2005-2011): If your Chamberlain opener has a purple “Learn” button, it operates on a 315 MHz frequency. These were some of the early MyQ-ready units. They can store up to 20 devices. The reset timing is identical to the yellow button models—a six-second hold.
- Red / Orange Learn Button (1997-2005): Older Chamberlain models often feature a red or orange “Learn” button. These units use a 390 MHz frequency. They have a more limited memory, supporting only 10 devices. These openers typically accept legacy keypads and remotes only.
- Green Learn Button (1993-1997): The oldest of the commonly found Chamberlain models have a green “Learn” button. These operate on a 390 MHz fixed code frequency. They have the lowest device limit, at 8 devices. Pre-dating Security+ technology, they lack MyQ support and are generally easier to spoof compared to newer models. The reset timing, however, remains the same six-second hold.
How to Identify Your Chamberlain Garage Door Opener Model
Sometimes, simply looking for the “Learn” button isn’t enough. Here are a few quick tips to help you identify your specific Chamberlain garage door opener model:
- Look for the Antenna: A short, yellow-tipped antenna is a strong indicator of a yellow “Learn” button model.
- Check the Manual Cover: Your Chamberlain garage door opener manual or owner’s manual will typically have the model prefix (e.g., B970, C450) and year printed inside the front page.
- Scan for MyQ Branding: If the opener unit housing displays “myQ” or has a Wi-Fi symbol, you’re almost certainly dealing with a yellow “Learn” button model. These models are designed for smart home integration and rely on myQ technology.
Colin L., a Denver garage door technician with 15 years on the job, highlights the importance of this knowledge: “The button’s color instantly tells me which remote to buy and how many codes the board can store”. This shows how crucial knowing your button color is for programming your Chamberlain garage door correctly.
Memory Slots and Rolling Codes
Every time you program a Chamberlain garage door remote or keypad, the Chamberlain opener’s logic board allocates a memory slot for that device. When you press and hold the “Learn” button for six seconds, you’re effectively erasing every one of these memory slots; there are no partial wipes.
Chamberlain’s rolling codes are a significant security feature. They change after every open/close cycle, acting as a strong defense against “code-grabber” hacks. This is especially true for yellow-button boards, which constantly shuffle through 100 billion combinations. Older green boards, however, rely on fixed codes, which are less secure.
If you find yourself needing to connect more than the maximum number of devices (e.g., more than 40 for yellow-button models), instead of replacing your entire opener unit, consider adding a remote-control repeater. This is a more economical solution and helps keep your existing travel limits intact.
Safety First: Before You Reset Your Chamberlain Garage Door Opener
Before you reset your Chamberlain garage door opener, take a moment for safety. Working with a garage door opener involves electricity, moving parts, and sometimes ladders—elements that demand caution. Spending a few minutes on these essential safety checks will help keep you safe and prevent damage to your unit.
Here’s a checklist of safety steps to perform:
- Kill the Power First: This is crucial. Before you start working on your Chamberlain opener, unplug the motor unit from its power source. If your specific Chamberlain garage door opener model has a backup battery, remember to pull the red tab to disconnect it as well. A common mistake is assuming that just because the door opener light is off, the board isn’t carrying current. It can still be “live”.
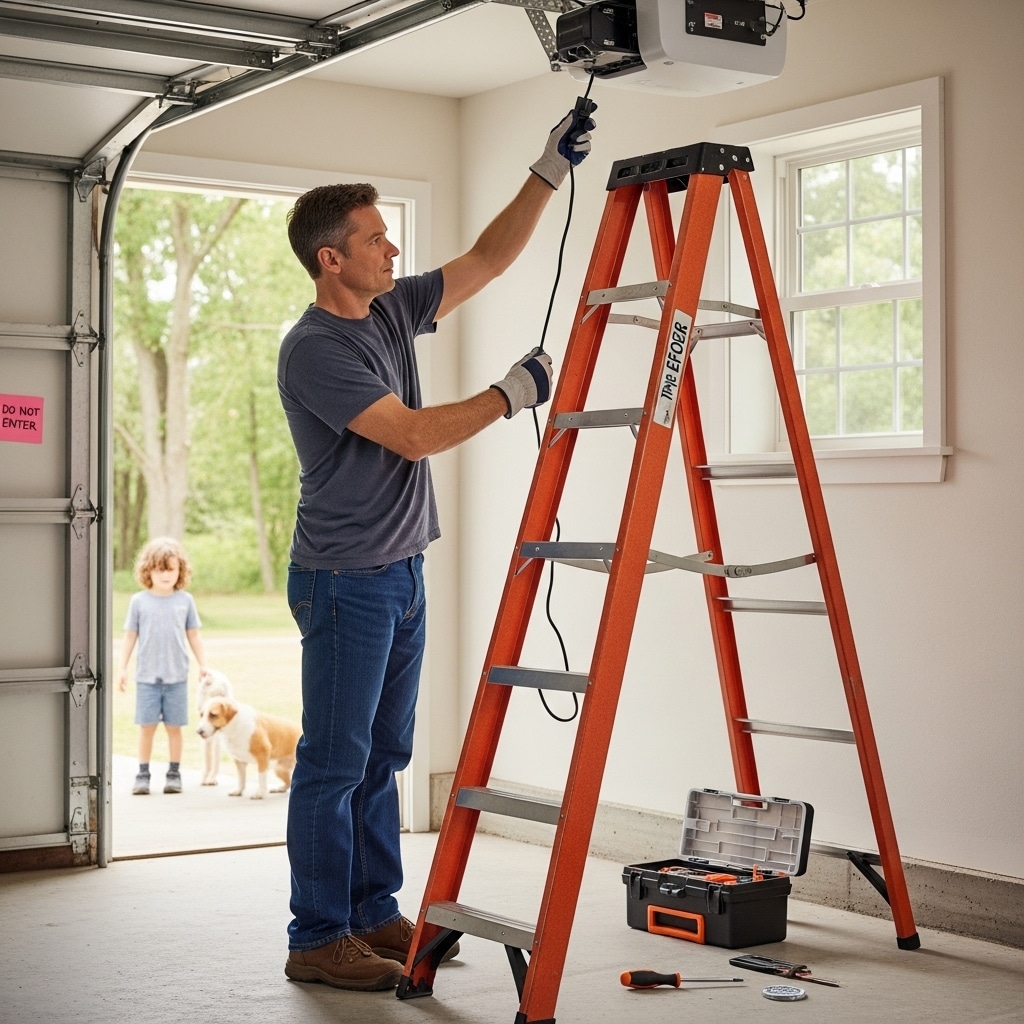
- Set the Ladder Correctly: If you need a ladder to access the opener unit, make sure it’s sturdy. Choose a Type II (225 lb) or better ladder. Place both feet firmly on level concrete, about one foot from the wall, and always lock the spreader. Avoid leaning a step ladder against the opener unit housing; this is an easy way for it to tip over.
- Check Sensor Alignment: Your safety sensors are vital for preventing the garage door from closing on obstructions. Both photo-eyes should glow steady green or amber. If one is blinking, loosen the wing nut and adjust it until the light is solid. Ignoring a blinking eye often leads to the door won’t close and mistakenly blaming the keypad or remote control later.
- Balance the Door: A properly balanced garage door is essential. To check, pull the red emergency cord to disconnect the garage door opener from the door. Then, lift the door halfway by hand. A healthy spring system will keep the door suspended in that position. Attempting to reset limits on a door with a broken torsion spring can strain the motor.
- Keep Pets and Kids Outside: Curious hands can accidentally press the remote control button or other buttons mid-reset, potentially wiping newly programmed codes. Close the service door to the garage and perhaps even post a note to prevent accidental interference.
Tool Checklist
Having the right tools on hand can make the reset process smoother:
- Flat-head screwdriver for the lens cover
- 41-inch nut driver for sensor brackets
- Fresh CR2032 coin-cell for keypads (always good to have spares!)
- Non-contact voltage tester (optional, but smart for confirming power is off)
As Anna P., a certified technician with 3,000 installs under her belt, wisely warns, “Most injuries happen before you even hit the Learn button—usually a wobbly ladder or a rushing DIYer”. Once the power to the garage door is off, your ladder is stable, and the photo-eyes glow steadily, you’re clear to grab that yellow Learn button and start the actual work of resetting and programming your Chamberlain opener.
How to Reset Your Chamberlain Garage Door Opener: Step-by-Step Methods
Knowing how to reset your Chamberlain garage door opener is a handy skill for any homeowner. The method you choose depends on the specific problem you’re trying to solve. From a quick fix for a misbehaving remote control to a complete system wipe, there’s a reset option for nearly every scenario.
Here are the primary methods for how to reset your Chamberlain garage door opener:
Quick Answer: The 60-Second Soft Reset
This is often your go-to solution for many common issues. It’s fast and effective.
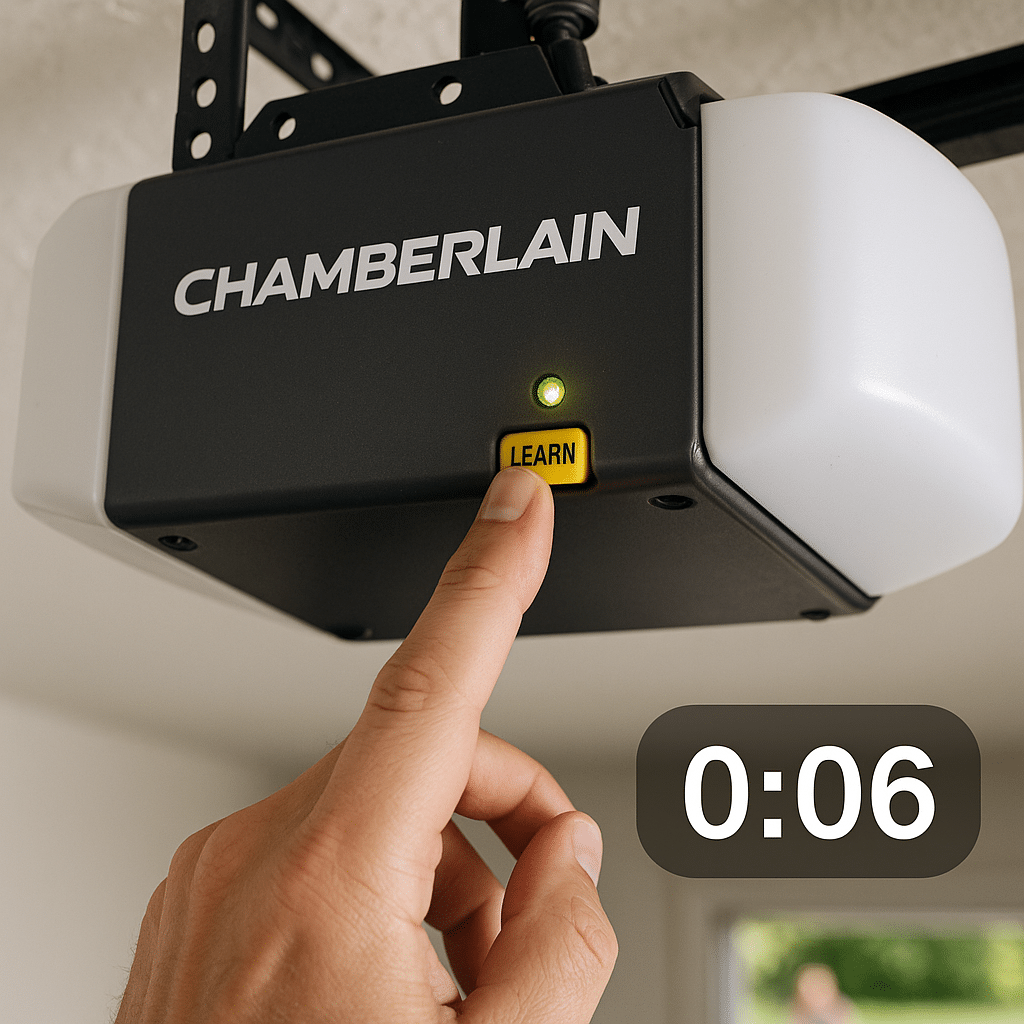
- TL;DR: Press and hold the yellow “Learn” button on the motor unit for six seconds.
- When the indicator light turns off, release it.
- Then, within 30 seconds, you’ll need to program your Chamberlain garage door accessories, like your remote control.
This “soft” reset is a technician’s favorite first step because it clears old codes and minor glitches without affecting your door’s travel limits. That means you won’t have to adjust how far your garage door opens or closes afterward. It’s ideal for wiping old codes, clearing glitches after a power surge, and getting your remote control working again.
Soft Reset (Six-Second Hold)
This method is perfect when you just need the door working right now. It’s the fastest way to deal with issues like a lost or stolen remote control or random electronic glitches.
- Unplug the opener for 10 seconds (optional, but can help clear momentary glitches from a recent power outage). Then, plug it back in. This confirms power is restored.
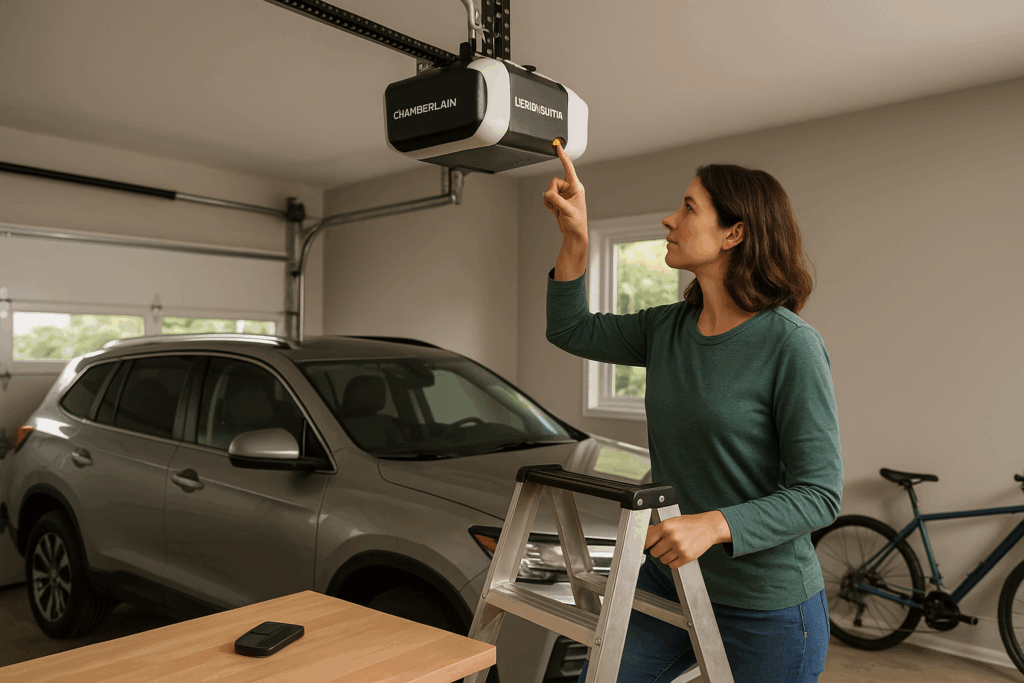
- Climb a sturdy ladder to access the motor unit.
- Press and hold the yellow Learn button for approximately six seconds. You’ll see the learn LED glow steady, then shut off.
- Release the button when the indicator light turns off. This means the memory storing remote control codes is now cleared. The light stays off, indicating the opener is in a blank state, ready to learn fresh codes.
- Within 30 seconds of releasing the “Learn” button, press the button on the remote you wish to save. The opener light will flash once or twice, indicating successful programming of that remote.
“A six-second hold wipes codes but leaves limits untouched. It’s my first move on every service call,” says Colin L., a service tech. This highlights why it’s the safest first step before trying deeper fixes.
Full Factory Reset (Thirty-Second Hold)
This is a more drastic reset that clears all settings, including travel limits and Wi-Fi configurations. You’d typically use this when selling a house, replacing the logic board, or if previous resets haven’t worked.
- Press and hold the Learn button for a full half-minute (30 seconds).
- Watch for the opener light to flash, then go dark. This indicates that codes, travel limits, and memory preferences are wiped.
- All settings are now gone. You’ll need to re-teach travel limits, then re-program remotes and keypads from scratch.
Tip: Keep your owner’s manual handy for the limit-setting steps. Each Chamberlain garage door opener model uses slightly different up/down arrow sequences for this process.
Power-Outage Limit Reset
If your Chamberlain opener hums but the door jerks or reverses, it often means the travel limits got scrambled during a power outage. This reset method addresses just that, without affecting your programmed remotes.
- Unplug the motor unit for 10 seconds.
- Plug it back in.
- Then, press the wall-mounted control to send the door fully open, and then fully closed. The logic board will record fresh high- and low-stop data. No codes are lost, so your remotes stay paired.
Wi-Fi / myQ Network Reset
Smart Chamberlain models store their network information on a separate chip. This means clearing your Wi-Fi settings won’t erase your remotes or keypads. This is useful if you’ve changed your router, Wi-Fi password, or switched to a 5 GHz mesh network.
- Climb up to the opener unit and press the small rectangular Settings button (often looks like a gear) until the opener beeps.
- Press and hold the button again for six seconds. A second beep confirms that the Wi-Fi data is gone.
- Open the myQ app, tap “Add Device,” and follow the on-screen steps to reconnect your Chamberlain opener to your new network.
Good to know: Yellow-button openers stay in accessory programming mode for three minutes. This gives you plenty of time to finish pairing devices after any reset.
Re-Programming Your Chamberlain Garage Door Opener After a Reset
Once you’ve performed a reset on your Chamberlain garage door opener, its memory is typically blank or cleared of specific settings. This means you’ll need to re-establish communication between your opener unit and your accessories, such as your remote controls and keypads. Don’t worry, the process for programming your Chamberlain garage door devices is straightforward. You usually have about 30 seconds after initiating programming mode to pair each device. Keep a ladder close and a fresh coin-cell battery on hand, especially for your keypads.
How to Program a Chamberlain Garage Door Remote
This process works for nearly all Chamberlain models, regardless of whether they have a yellow, purple, red/orange, or green Learn button.
- Press and release the Learn button on the opener. The LED indicator on the motor unit will glow steady for 30 seconds, signifying it’s ready to learn a new code.
- Press and hold the button on your remote control that you want to assign to operate your garage door.
- Release the button on your remote control when the opener light blinks (or you hear two clicks). This confirms that the code is stored, indicating successful programming.
Troubleshooting tips for your garage door remote:
- Light never blinks: If the opener light doesn’t blink, try moving the remote control closer to the opener unit or replace its battery.
- The door starts, then stops: This usually points to obstructions at the safety sensors. Clear any debris or objects in their path.
- Remote still dead: If the remote control still isn’t working, it might be the wrong frequency for your Chamberlain opener. Double-check the Learn button color to ensure compatibility. Universal remote controls may require additional steps, such as setting a brand-selection switch.
How to Program a Chamberlain Wireless Keypad
Chamberlain keypads offer convenient access to your garage without a remote control. When programming a new keypad, choose a four-digit PIN that’s easy for family members to remember but hard for outsiders to guess.
- Press the Learn button twice on your opener. The command LED will flash.
- On the keypad, enter your new PIN, then press ENTER.
- The opener light blinks, signaling that the keypad is programmed and the code is stored.
- Test by typing the PIN again. The garage door should move within two seconds.
Common keypad mistakes to avoid:
- Low 9-volt battery: Swap it yearly to avoid intermittent signal issues.
- Sunlight hitting the keypad sensor: If numbers don’t register consistently, add a small shade over the keypad.
- Incompatibility: Many universal remote controls may require checking if the keypad is compatible with older green-button Chamberlain models.
Sync Your Opener with the myQ App
Smart Chamberlain models with myQ technology store network information separately from remote control codes. If you’ve done a factory reset or changed your Wi-Fi, you might need to clear and re-add the network profile.
- Press and hold the small gear/settings button on the opener unit until it beeps (this usually takes about six seconds).
- Release the button, then press and hold it again. A second beep confirms that the Wi-Fi profile is erased.
- Open the myQ app, tap “Add Device,” and follow the on-screen prompts to reconnect.
- Enter your Wi-Fi password. The LED on the opener unit will turn solid green when successfully connected to your home network.
myQ Status Light Meanings:
| Status Light | Meaning |
| Blinking blue | Ready for setup or failed to connect |
| Solid green | Connected to home network |
| Flashing amber every 2 sec | Firmware update in progress—do not unplug |
Programming More Than One Remote?
If you have multiple handheld remote controls or a universal remote, the process is similar for each:
- Press Learn again for each additional handheld.
- Universal remote controls may require a brand-selection switch or specific setup instructions before pairing.
- Remember that Chamberlain models have different device limits: yellow-button boards store up to 40 devices, purple boards store 20, red/orange 10, and green 8.
As Sam J., an installer in Orlando, says, “Pairing a spare remote takes under ten seconds once you know the rhythm.” With these steps, programming your garage door opener after a reset should be quick and efficient, restoring full functionality to access your garage easily.
Troubleshooting If the Reset Fails
Even after carefully performing a reset on your Chamberlain garage door opener, you might encounter a stubborn issue. Don’t throw in the towel just yet! Many lingering faults can be resolved with a few quick checks before you consider calling a technician for garage door repair.
Here are some common post-reset headaches and how to troubleshoot them:
Common Post-Reset Headaches
- The indicator light never comes on:
- Likely Cause: No power or a blown logic-board fuse.
- Fast Fix: Confirm the Chamberlain opener is plugged in securely and the breaker is on. You can test the outlet with another appliance to rule out a power issue.
- The door opener light flashes 10 times, and the door won’t close:
- Likely Cause: Safety sensors are blocked, misaligned, or have a wiring fault.
- Fast Fix: Wipe the lenses of the safety sensors clean. Align the photo-eyes until both glow steady. Inspect the sensor wires for any pinches or damage. This is a very common issue, as Wayne H., a Sears PartsDirect trainer, notes: “Nine times out of ten, a 10-flash error is nothing more than a dusty photo-eye”.
- Remote or keypad dead after reset, but works:
- Likely Cause: A Low 9-volt battery in the keypad or a wrong PIN entered.
- Fast Fix: Replace the battery in your Chamberlain keypads. For keypads, re-enter the PIN, then press Enter within 30 seconds of pressing the Learn button.
- Opener clicks, but the door won’t move:
- Likely Cause: Lost travel limits during a power cut.
- Fast Fix: Unplug the opener, wait 10 seconds, plug it back in, and run the door fully up then down with the wall-mounted control to retrain the limits.
- myQ app still shows “offline”:
- Likely Cause: Wi-Fi profile not cleared properly.
- Fast Fix: Repeat the gear-button Wi-Fi reset (hold, beep, hold again) and rejoin the network in the myQ app. This ensures the opener unit can properly communicate with your home network.
Flash-Code Reference Table
Chamberlain openers often provide diagnostic codes through flashes of the main light, usually visible behind the lens cover or directly from the door opener light itself. Counting these flashes can help pinpoint the problem.
| Main Light Flash Count | What It Means | DIY Action |
| 1 | No sync between the travel module and the logic board | Cycle door once with wall button. |
| 5 | Motor overheated | Wait 15 minutes; cycle again. |
| 10 | Safety sensors misaligned or blocked | Clean, align, secure wiring. |
Quick Sensor Alignment Hack
If you’re dealing with the common 10-flash error, here’s a simple trick to realign your safety sensors:
- Loosen the wing nut on the receiver (the sensor with the green LED).
- Aim it until the green light glows steadily. Then, tighten the nut.
- Test by closing the door. The light should stop flashing, and the door should glide down smoothly.
Still Stuck?
If your Chamberlain garage door opener still refuses to budge after all these steps, consider these final actions:
- Factory reset again: Press and hold the Learn button for 30 seconds to clear every setting, then re-program from scratch.
- Swap the remote battery: A weak CR2032 coin-cell battery can register during pairing but fail under load when you try to operate your garage door.
- Check the antenna wire: Ensure it dangles freely from the opener unit. A kinked lead can severely slash your remote control‘s range.
- Look for blinking sensor LEDs: If either sensor eye blinks after alignment, it might be time to replace the sensor pair.
Most faults surrender to the steps above. If your Chamberlain garage door opener still refuses to budge, the logic board or motor cap may be fried, meaning it’s time to book professional service for garage door repair
Maintenance Tips to Keep Your Chamberlain Garage Door Opener Trouble-Free
Performing a reset on your Chamberlain garage door opener can solve many problems, but good maintenance habits can prevent them from happening in the first place. Regular care helps extend the life of your Chamberlain opener and ensures reliable operation. Think of it as preventative medicine for your garage doors. Spending just ten minutes each quarter on these tasks can add years to your motor and rollers.
Here are key maintenance tips to keep your Chamberlain garage door opener in top shape:
| Task | Check the door balance | Why It Helps |
| Lubricate hinges, rollers, and the chain/belt | Every 6 months | This reduces strain on the motor and quiets operation. A small tube of white-lithium grease is perfect; a single dab on each hinge pin works better than a heavy spray. |
| Yearly or when the range drops | Yearly or when range drops | Weak coin-cell batteries cause intermittent signal loss, leading to unreliable operation of your garage door remote. If your remote control isn’t working as well as it used to, try swapping out the battery. |
| Wipe and align safety sensors | Monthly | Misaligned or dirty safety sensors are a common cause of issues. They can make the opener light flash 10 times and prevent the door from closing. Keeping them clean and aligned helps prevent unnecessary troubleshooting or calls for garage door repair. |
| Change the remote control and keypad batteries | Twice a year | A balanced door can be lifted halfway by hand and stay put. This prevents motor overload, which can shorten the life of your Chamberlain opener. If the door doesn’t stay put, your springs might need adjustment. |
| Inspect the antenna wire | Each maintenance session | A straight, unobstructed antenna wire gives the remote control maximum range. Make sure it dangles freely from the opener unit and isn’t tangled or kinked. This ensures your Chamberlain garage door remote has the best possible signal. |
| Test auto-reverse | Monthly | This is a crucial safety test. Place a 2×4 board flat under the door. If the door doesn’t reverse on contact, you need to lower the force setting on your Chamberlain opener. This prevents serious injury or damage if something is in the door’s path. |
By following these simple maintenance tips, you’ll contribute significantly to the longevity and reliability of your Chamberlain garage door opener. Regular checks and small adjustments mean fewer unexpected issues and more peace of mind knowing your garage doors will open or close smoothly when you need them to.
Frequently Asked Questions About Resetting a Chamberlain Garage Door Opener
Here are answers to some common questions homeowners have about how to reset a Chamberlain garage door opener and related topics:
1. Can I reset a LiftMaster and Chamberlain the same way?
Yes, you can. LiftMaster and Chamberlain share the same parent company, which means the “Learn” button timing and reset procedures are identical for both brands.
2. Will a factory reset wipe my myQ settings?
It will. If you press and hold the “Learn” button for 30 seconds for a full factory reset, every setting—including Wi-Fi and myQ technology profiles—disappears. You will need to re-pair the opener in the myQ app afterward using the setup instructions.
3. How many remotes can I add after a soft reset?
The number of remotes and devices you can add depends on your Chamberlain garage door opener model and its “Learn” button color.
- Yellow-button logic boards store up to 40 devices.
- Older purple-button boards store 20 devices.
- Red/orange-button models store 10 devices.
- Green-button models store 8 devices.
4. The opener light blinks 10 times after a reset—what now?
If your Chamberlain opener light blinks 10 times after a reset, it almost always indicates an issue with your safety sensors. The most common cause is misaligned or obstructed photo-eyes. You’ll need to clean and realign them. Even a single speck of dust can prevent the door from closing.
5. Do universal remotes always work?
Most universal remote controls may require compatibility checks. While many are designed to work with Chamberlain openers, you should always check that the universal remote supports your Learn button color and, for newer models, Security+ 2.0 rolling codes. Some universal remote controls may require additional steps for programming a new device or specific Chamberlain models. Refer to the user manual for your universal remote for detailed setup instructions.
Final Thoughts: One Button, Big Peace of Mind
Understanding how to reset your Chamberlain garage door opener is a powerful tool for any homeowner. A quick press and hold of the “Learn” button can clear old codes, block would-be thieves, and restore daily convenience to your garage doors.
After a reset, remember to program a Chamberlain garage door remote or keypad again. Pair fresh remotes, keep those crucial safety sensors clean, and swap batteries in your remote controls and Chamberlain keypads on schedule. Your Chamberlain garage door opener will reward you with quiet, reliable service, and you’ll avoid that sinking feeling when the door refuses to budge on a rainy night. This simple knowledge brings significant peace of mind.