
Your garage isn’t just a place to park your car; it’s an extension of your home. But often, the bare concrete floor goes unnoticed, collecting dust, stains, and looking, well, a bit sad. Imagine transforming that drab slab into a vibrant, easy-to-clean surface that stands up to spills, hot tires, and heavy use. Painting your garage floor with the right products and techniques can give it a fresh, durable surface that truly makes a difference. This guide will walk you through how to paint a garage floor so it not only looks great but also performs like a champ for years to come.
Why Paint or Epoxy Your Garage Floor?
Giving your garage floor a fresh coat of garage floor paint or epoxy offers a surprising number of advantages beyond just looking good. Many homeowners overlook the impact a finished concrete floor can have on the entire space. It’s about more than just aesthetics; it’s about protection, longevity, and making your garage a more functional and pleasant area.
First, consider the immediate visual impact. A painted or epoxied concrete garage floor instantly adds curb appeal to your home. It transforms a typically ignored area into a polished, intentional space. Beyond that, it tackles a common problem with bare concrete: dust. Unsealed concrete constantly sheds a fine, gritty dust that gets tracked into your home and settles on everything in your garage. A proper coating seals off the concrete, virtually eliminating this persistent dust issue.
Beyond the aesthetics, a painted or epoxy concrete surface provides significant protection. Your garage floor faces constant threats: oil leaks, chemical spills, dropped tools, and the consistent wear from car tires. Epoxy paint and dedicated garage floor paint create a durable barrier that resists these common issues.
This protection is key to preserving the integrity of your concrete long-term. One of the most common complaints about an untreated concrete garage floor is “hot tire pickup.” This is when hot tires from a recently driven car cause the paint to lift or peel. High-quality epoxy systems are designed specifically to resist this problem, ensuring your new paint stays put.
Finally, maintenance becomes significantly simpler. A sealed, smooth garage floor is a breeze to clean. Spills bead up, allowing for easy wipe-downs. Sweeping and mopping are no longer a fight against porous concrete; instead, they become quick and effective tasks. This ease of cleaning contributes to a healthier, more inviting garage environment.
Benefits of Painting a Garage Floor Over Bare Concrete
Let’s face it: a bare concrete floor in a car garage isn’t ideal. It’s prone to stains and can deteriorate quickly. A treated surface offers clear advantages.
A major benefit of using garage floor paint or epoxy is less dust. Untreated concrete constantly sheds fine particles, which get tracked into your home. A sealed surface solves this, keeping your garage and house much cleaner.
Beyond dust, a coated concrete garage floor resists stains better. Oil, grease, and other fluids soak into bare concrete, leaving permanent marks. An epoxy or floor paint coating creates a non-porous barrier, so spills sit on the surface for easy cleanup.
Think about a spilled can of paint. On bare concrete, it’s a huge mess. On a coated floor, it’s a minor spill that wipes away easily.
Another key benefit is improved durability for your concrete floor. Concrete can chip and crack from heavy use or chemicals. A good epoxy concrete system adds a protective layer. This layer resists abrasion, impacts, and chemical damage, extending your floor’s life. It saves you from costly repairs later.
Finally, a finished garage floor improves the entire look and feel of your garage. It transforms a basic space into a clean, bright, and organized area. This aesthetic upgrade makes the garage more inviting for hobbies or just parking your car.
Comparing Epoxy, Floor Paint, and Clear Sealer
When you consider painting your garage, you’ll find a few main options: epoxy, dedicated garage floor paint, and clear sealers. Each has unique features, benefits, and ideal uses. Knowing these differences helps you pick the right product for your budget and needs.
Epoxy coatings are often considered the top choice for garage floor durability. These are typically 2-part epoxy systems, where a resin and hardener mix just before you apply them. This chemical reaction creates a very hard, long-lasting finish. It resists stains, abrasions, and hot tire pickup exceptionally well.
True epoxies penetrate the pores of the concrete, forming a strong bond that resists peeling. They offer a high-gloss finish and come in various colors. You can often add color chips for texture and better grip. While they need careful mixing, their superior performance makes them a favorite for busy garages. Brands like Rust-Oleum offer popular 2-part epoxy kits for DIY projects.
Garage floor paint, sometimes called 1-part epoxy or acrylic paint, is usually an acrylic latex product with some epoxy for added durability. These paints are simpler to use than 2-part epoxy because they don’t require mixing components. They’re generally more affordable and offer many colors.
However, they aren’t as durable or chemical-resistant as true 2-part epoxy systems. They protect against dust and minor spills but are more prone to hot tire pickup, chipping, and wear, especially in high-traffic areas. They’re a good option for a quick refresh in a lightly used garage, but they won’t hold up as well under constant car tires.
Clear sealers are designed to protect bare concrete without changing its look much. They can be acrylic, polyurethane, or epoxy-based. Their main goal is to prevent dusting, improve stain resistance, and offer some moisture protection. They don’t provide the same wear resistance or aesthetic change as paints or epoxies.
A clear sealer is a good choice if you like the natural look of concrete but want protection and easier cleaning. They are also often used as a top coat over epoxy paint for extra protection and gloss.
| Feature | 2-Part Epoxy | Garage Floor Paint (1-Part) | Clear Sealer |
| Durability | Excellent | Good (for light traffic) | Fair |
| Adhesion | Superior bond | Good, less penetrating | Good, surface-level |
| Application Ease | More involved | Simple | Simple |
| Cost | Higher | Moderate | Lower |
| Appearance | High-gloss, colors, flake options | Various colors, less gloss | Transparent |
| Hot Tire Pickup | Highly resistant | Susceptible | N/A |
| Lifespan | 5-10+ years | 1-3 years | 1-5 years |
Export to Sheets
Ultimately, your choice depends on your budget, desired durability, and how much use your garage floor gets. For the best results and long-term performance, a 2-part epoxy paint system is often recommended for most home garages.
Durability vs Cost: What Holds Up Best Under Car Tires?
When painting your garage floor, how well the coating stands up to car tires is a major concern. This means resisting “hot tire pickup,” chemical spills, and daily abrasion. Balancing durability with cost helps you make a smart choice.
2-part epoxy coatings are top for durability, especially against hot tire pickup. This happens when hot tires lift a softer coating from the concrete floor. Because 2-part epoxy forms a hard, bonded layer with the concrete, it’s far less prone to this. It also resists chemicals, oil, and gas spills well.
The upfront cost for a quality 2-part epoxy kit, like those from Rust-Oleum, might be higher. However, its long life often means lower cost over time since you won’t need to repaint as often. It’s an investment that saves you time and money on future re-applications.
Standard garage floor paint (1-part acrylic or latex) is much cheaper initially and easier to apply. But this lower cost comes with less durability. These paints are more likely to peel, chip, and show wear, especially in busy areas or with heavy vehicles. You might repaint every couple of years, and those costs add up. While cheaper at first, the long-term value might be less if durability is important.
Clear sealers offer some protection but aren’t designed for the direct wear of car tires. They resist stains and reduce dust but won’t provide a durable, traffic-resistant surface. They’re best as a protective layer over other coatings or for very lightly used areas.
Consider how you use your garage. Do you park cars daily? Work on vehicles often? Is it a high-traffic area for hobbies or storage?
| Coating Type | Durability Under Car Tires | Initial Cost | Long-Term Value (Approx. Lifespan) |
| 2-Part Epoxy | Excellent | Higher | High (5-10+ years) |
| Garage Paint | Fair to Good | Lower | Moderate (1-3 years) |
| Clear Sealer | Limited | Lowest | Limited |
Export to Sheets
For most homeowners who want a durable, long-lasting garage floor that handles daily car traffic without issues like hot tire pickup, a quality 2-part epoxy system provides the best results. The initial investment is worth the peace of mind and less frequent need to repaint.
Tools & Materials Checklist
Before you start painting your garage floor, gathering all the right tools and materials is crucial. This step saves you countless trips to the hardware store and ensures your DIY projects stay on track. Think of it like preparing for a big cooking adventure – you wouldn’t start without all your ingredients measured out, right? The same applies here. Having everything ready to go makes the process smoother and helps you get the best results.
This checklist provides a clear, skimmable list of what you’ll need. We’ll even point you toward some reputable product pages for research, so you can pick the right items for your specific garage floor makeover.
Must-Have Gear
You absolutely need these items to properly prep the floor and apply the coating. Don’t cut corners on this list; each item plays a role in the adhesion and durability of your new paint.
- 2-part epoxy or single-part garage floor paint: This is the star of the show. If you’re aiming for a durable finish that resists hot tire pickup, a 2-part epoxy system (like those from Rust-Oleum or Behr) is your best bet. If you opt for floor paint, make sure it’s specifically designed for concrete and garages.
- Concrete etcher: This is non-negotiable for proper adhesion. Products like Rust-Oleum Concrete Etch open up the pores of the concrete, allowing the paint to bond to the concrete effectively.
- Degreaser: Before etching, you’ll need a strong degreaser (such as Krud Kutter or simple dish soap for light grease) to clean the concrete and remove oil and grease stains.
- Broom: A stiff-bristled push broom is essential for sweeping away loose debris from the entire garage before and after cleaning.
- Scraper: A long-handled scraper (like a paint scraper or floor scraper) will help remove any caked-on grime, old paint flakes, or adhesives.
- Paint brush: You’ll need a smaller paint brush (2-3 inches wide) for “cutting in” around the edges, corners, and areas near the garage door where a roller can’t reach.
- Roller and extension pole: A 9-inch roller frame with appropriate roller covers (often 3/8-inch nap for smooth surfaces, but check your paint’s recommendation) and an extension pole will make applying the first coat and second coat much easier on your back.
- Pressure washer: While not always strictly necessary for every concrete floor, a pressure washer makes cleaning your concrete much faster and more thorough, especially for heavily soiled surfaces or large garages.
- Mixing sticks: For 2-part epoxy, you’ll need several sturdy mixing sticks to properly combine the components.
- Measuring cups/buckets: Accurate measuring is critical for 2-part epoxy to ensure the correct mix ratio and proper curing.
Nice-to-Have Extras
These items aren’t strictly essential for applying the coating, but they can enhance the final look, add functionality, or make the job a bit easier.
- Color chips for texture: Adding decorative color chips (also called flakes) to your wet epoxy paint creates a granite-like appearance and adds a subtle texture that can improve grip. Many epoxy flooring kits include these, or you can buy them separately.
- Low-VOC additive for tight spaces: If your garage isn’t well-ventilated, a low VOC (Volatile Organic Compound) additive can reduce fumes, making the environment more comfortable during application.
- Mat for heavy machinery zones: If you have a workbench, car lift, or frequently park a heavy vehicle in one spot, a specialized mat can add an extra layer of protection against spills and localized wear, even on a painted garage floor.
- Sander: For areas with old, flaking paint or stubborn stains that won’t come up with etching, a concrete grinder or heavy-duty sander with appropriate attachments can provide the best results for surface preparation.
- Spill absorbent/cleanup rags: Accidents happen. Having some kitty litter, sawdust, or old rags on hand for unexpected spills of paint or chemicals is always smart.
- Painter’s tape: To protect baseboards or walls around the perimeter of your entire garage, painter’s tape helps create clean lines.
- Non-slip additive: If you’re concerned about your high-gloss epoxy being too slick, a fine-grit non-slip additive can be mixed into the final coat or broadcast over it for added traction.
Prep Work: The Secret to Paint Adhesion
This is where your garage floor makeover truly begins. Pros will tell you: prep the floor is 80% of your success. If you skip steps here, your new paint will likely peel or flake. Good adhesion comes from patient, thorough preparation. You need your concrete floor perfectly clean, dry, and ready to bond.
Clear the Entire Garage
First things first: your entire garage must be empty. This means every single item. Bikes, tools, storage bins—they all need to go. Move them to your driveway, backyard, or a temporary storage spot.
Why? You need full access to every part of the concrete floor. You can’t properly clean the concrete or paint if you’re constantly shifting things around. Plus, it’s a great chance to declutter before everything returns to your newly transformed space.
Clean the Concrete & Remove Stains
Once empty, get that concrete floor spotless. Start with a stiff broom to sweep up all loose dirt. Then, tackle the deeper clean.
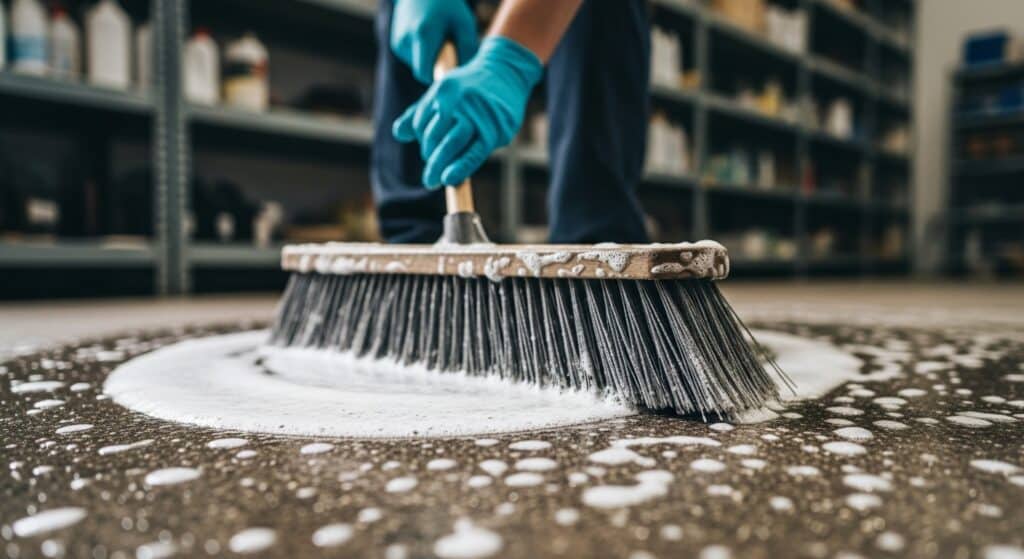
For oil, grease, or stubborn stains, use a strong degreaser. Apply it to stained areas, letting it sit as directed. You might need to scrub tough spots with a stiff brush.
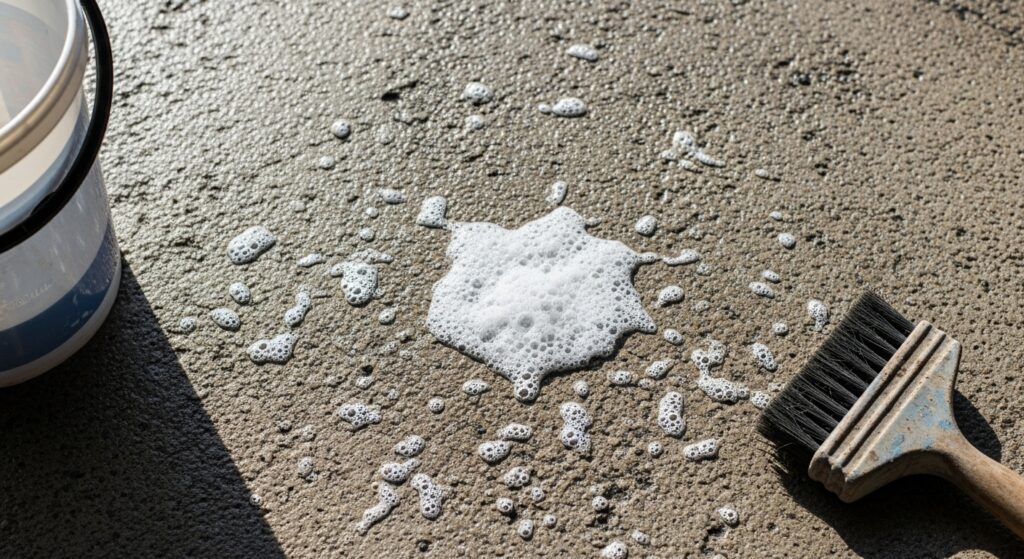
After degreasing, wash the whole garage floor. A pressure washer works wonders, blasting away dirt and degreaser residue. If you don’t have one, use a hose with a strong nozzle and a deck brush with a concrete cleaner. Rinse thoroughly until no suds remain. Any leftover residue hurts adhesion. Let the floor dry completely after this, and we mean bone dry.
Etch to Open the Pores of the Concrete
This step is vital for adhesion, especially for epoxy concrete coatings. Bare concrete can be smooth, preventing paint from sticking well. A concrete etcher (often an acid solution) lightly roughens the surface. This creates tiny pores of the concrete that the new paint can penetrate and bond to the concrete, creating a much stronger finish.
Always follow the etcher’s instructions. Mix it with water and apply it to a damp concrete floor. You’ll see it fizz, meaning it’s working. Keep the floor wet and scrub with a stiff brush. Then, rinse, rinse, rinse! Use a pressure washer if you can, to remove all residue.
The floor is clean when water beads evenly. Now, let it dry for at least 24-48 hours, longer in humid areas. It must be bone dry. To check, tape a small plastic sheet to the floor overnight. If condensation forms underneath, it’s still too wet.
Patch Cracks or Holes and Let Them Cure

After cleaning and etching, you’ll see any cracks or holes. Now’s the time to fix them. Use a quality concrete patching compound or epoxy crack filler. For small cracks, an epoxy filler is fine. Larger damage might need a trowel-applied patching compound.
Clean out any loose bits from the cracks before applying filler. Overfill slightly, then smooth it flush with the concrete floor. Let it cure fully as the manufacturer suggests—this could take days. Don’t rush, as uncured patches can affect your new paint. A smooth, uniform surface is crucial for a professional, durable finish.
Check Temperature and Humidity Before Mixing
Many DIYers skip this, which leads to problems. Temperature and humidity during application greatly affect how well your epoxy paint or garage floor paint cures and adheres. Most products need specific temperature ranges (e.g., 50-90°F) and humidity limits for the best results.
- Temperature: Too cold, and paint might not cure, staying tacky. Too hot, and it dries too fast, causing brush marks. Check both the air and concrete floor temperature with a thermometer.
- Humidity: High humidity can mess with curing, leading to a hazy finish or poor adhesion, especially for water-based coatings.
Plan your project for a dry, moderately warm period. Avoid rainy or very humid days. If using 2-part epoxy, be aware of its “pot life”—the time you have to apply it after mixing. This time is shorter in warmer conditions. Proper conditions ensure your new paint sets correctly, making your floor hold up well for years.
Step-by-Step Painting Guide
You’ve prepped the garage floor; now for the exciting part: applying the new paint. This brings your vision to life. Breaking the process into small steps makes it easier. Remember, patience is key, especially with cure times.
Mix the 2-Part Epoxy Paint (or Shake Floor Paint)
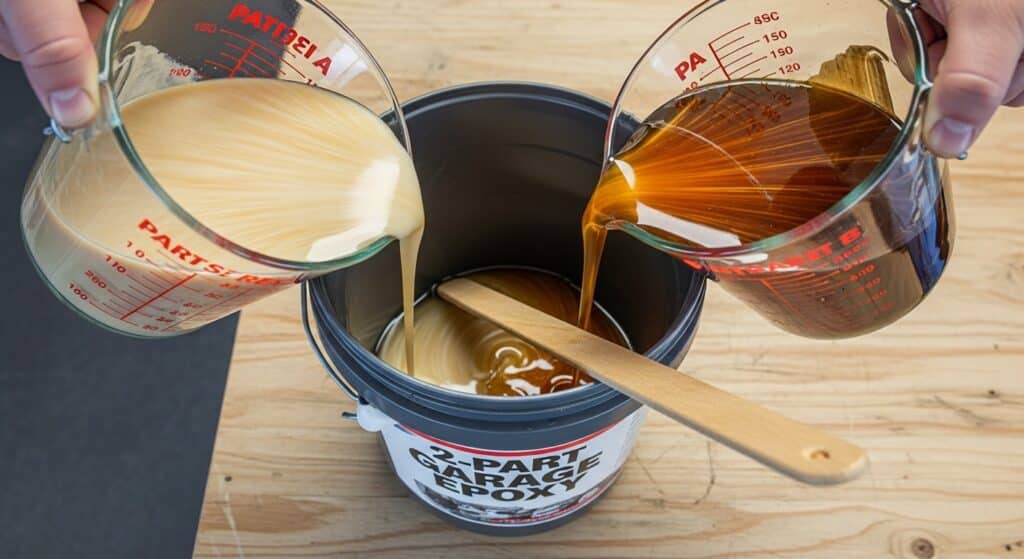
This is vital for 2-part epoxy. You’ll have a resin (Part A) and a hardener (Part B). Mix them precisely as the instructions state, typically by pouring Part B into Part A and stirring for 3-5 minutes. Scrape the sides and bottom of the bucket for a complete mix.
Why is this important? The chemical reaction creates the durable finish. Improper mixing means the epoxy won’t cure right, leading to soft or tacky spots or poor adhesion. Once mixed, 2-part epoxy paint has a limited “pot life”—the time you have to apply it before it hardens in the bucket. This can be 1-4 hours, shorter when warm. Don’t mix more than you can apply in that time.
If using single-part garage floor paint, it’s simpler. Just shake the can well or stir it until uniform. No pot life worries, so you have more flexibility.
Cut In Around the Edges With a Brush
Just like painting a room, “cut in” before rolling. Use a paint brush (a 2-3 inch angled brush works well) to apply the epoxy paint or floor paint around the perimeter of your entire garage. This includes walls, the garage door frame, and columns.
Cut in about 4-6 inches from the edge. This creates a clean border, letting you use your roller without hitting walls. Take your time here; a steady hand makes the final painted garage floor look great.
Roll the First Coat in Sections

Time for the main application! Pour mixed epoxy paint (or shaken floor paint) into a roller tray. Use a quality roller cover on an extension pole. Start in a far corner, working towards the garage door so you don’t trap yourself.
Apply paint in small sections, like 4×4 or 5×5 feet. Roll in a “W” or “M” pattern, then fill it in by rolling perpendicularly for even coverage. Overlap passes slightly to avoid marks. Aim for a thin, uniform coat. Don’t apply too thick, as this can cause uneven drying. For large areas, mentally divide the concrete floor to manage progress. The first coat aims for even coverage, not full opacity.
Broadcast Flake Chips While Wet for Grip
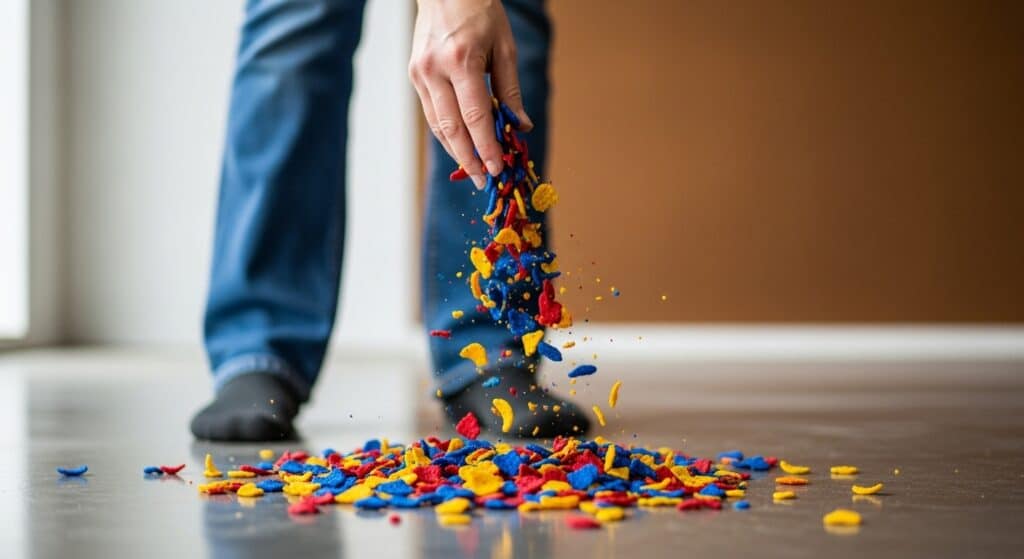
If you’re adding color chips for looks and texture, do it now. As soon as you finish rolling a small section of the first coat, and while the epoxy paint is still wet, lightly scatter the chips.
Take handfuls of color chips and toss them upwards and outwards, letting them fall randomly onto the wet paint. Avoid clumping. Aim for an even, speckled look. Do this right after painting each section, as epoxy cures quickly. The flakes embed into the wet paint, adding slip resistance and a visually appealing finish that hides minor imperfections on the concrete floor.
Wait, Inspect, Then Apply the Second Coat
Patience is crucial between coats. Check your product’s instructions for the recoat window. For 2-part epoxy, this is usually 12-24 hours. Applying the second coat too soon can affect curing and adhesion. Waiting too long can mean the first coat is too hard for the second coat to bond to the concrete effectively.
Before the second coat, inspect the painted garage floor. Look for missed spots, thin areas, or small bumps. If you see debris, lightly scrape it off with a scraper. Then, mix a fresh batch of 2-part epoxy (if needed) and apply the second coat the same way: cut in edges, then roll sections. The second coat deepens color, adds durability, and ensures a solid, professional finish.
Seal With a Clear Topcoat for Better Durability
For the best results and maximum longevity, especially with epoxy flooring, consider a clear coat as a topcoat. This is optional but highly recommended. A clear polyurethane or epoxy concrete sealer over your color coats adds extra protection against abrasion, chemicals, UV damage (which can yellow colors), and hot tire pickup.
A clear coat also boosts the high-gloss finish, making your painted garage floor truly look great. Apply it thinly and evenly after your second coat has fully cured (typically 12-24 hours after the last color coat). This extra step significantly adds better durability and helps your garage floor stay holding up well for years.
Cure Times: Foot Traffic vs Parking the Car
Many people rush through this, causing problems. Paint feels dry quickly, but it needs time to fully cure and harden. There are two key cure times:
- Foot Traffic: When you can walk carefully on the new paint. For most garage floor paint or epoxy, this is usually 24-48 hours after the final coat. Avoid dragging heavy items.
- Parking the Car (Heavy Use): This is the crucial time for the coating to fully harden and withstand the weight and heat of car tires. For 2-part epoxy, this can be 5-7 days, or even longer (up to 10-14 days) in cooler or humid conditions. Single-part floor paint might be quicker, but it still requires patience.
Rushing this step can lead to permanent damage like peeling or tire marks. It’s always best to wait longer than the minimum recommended time, especially before driving your vehicle onto the new paint.
Troubleshooting & Fixes
Even with the best preparation, sometimes things don’t go exactly as planned. Don’t worry! Many common issues with garage floor paint or epoxy can be fixed. Knowing what to look for and how to tackle problems will save you time and frustration, getting your painted garage floor back on track.
Why Is My Paint Peeling?
Peeling is one of the most frustrating issues, and almost always points back to poor prep work. If your garage floor paint or epoxy is lifting from the concrete floor, here are the usual culprits:
- Improper Cleaning: The concrete floor wasn’t thoroughly cleaned before painting. Any oil, grease, dirt, or wax residue will prevent the paint from properly bonding to the concrete.
- Skipping Etching (or Poor Etching): This is a huge one. If you didn’t etch the bare concrete or didn’t do it properly, the pores of the concrete weren’t opened enough. This means the paint couldn’t get a good grip, leading to poor adhesion.
- Moisture in the Concrete: If the concrete floor wasn’t completely dry before painting, trapped moisture will eventually push the paint up and cause peeling. Always check for moisture.
- Hot Tire Pickup: While good 2-part epoxy resists this, cheaper floor paint or improper curing can lead to tires lifting the paint, especially if the vehicle is parked on it too soon after application.
Fix: For isolated peeling, you can try a spot-repair. Scrape away all loose and peeling paint, then re-clean, re-etch the bare concrete, and repaint that section. For widespread peeling, you might need to scrape or grind off the entire old coating and repaint the entire garage floor from scratch, ensuring meticulous prep work this time.
Tackiness After 24 Hours: Causes and Cures
Does your epoxy paint feel sticky or gummy even after 24 hours? This usually indicates a curing problem, especially with 2-part epoxy.
- Improper Mixing: The most common reason. If the resin and hardener (Parts A and B) weren’t mixed thoroughly or in the correct ratio, the chemical reaction wouldn’t complete.
- Temperature or Humidity Issues: Applying in temperatures too cold or in very high temperature and humidity can stop proper curing. The paint needs specific conditions to harden.
- Old Product: Sometimes, expired epoxy components might not cure correctly.
Fix: Unfortunately, tacky epoxy that hasn’t cured properly often needs to be removed. You can try increasing the temperature in the garage if it’s cold, or using fans for ventilation if it’s humid, but this is a long shot. More likely, you’ll need to scrape off the uncured material (which can be messy), then clean the concrete floor with solvents (like denatured alcohol or acetone, with proper ventilation), and repaint. It’s a pain, but vital for a durable finish.
Hot Tire Marks and How to Prevent Them
Seeing black tire marks or actual lifting where your car tires sit? This is hot tire pickup, a common complaint that usually comes from a few issues:
- Insufficient Cure Time: The most frequent cause. You parked your car on the new paint before it had fully cured. While it feels dry, the epoxy or paint needs days (or even weeks for 2-part epoxy) to reach maximum hardness.
- Wrong Product: Using standard floor paint not designed for garage floor traffic or high-quality 2-part epoxy is a recipe for this problem.
- Thin Coats: Applying the paint too thinly can reduce its resistance.
Prevent: The best results come from patience. Always adhere strictly to the manufacturer’s recommended cure times for vehicle traffic. For 2-part epoxy, this means waiting at least 5-7 days, and often longer. Using a 2-part epoxy system specifically designed for garages is also key. Some homeowners use an additive in their final top coat or a protective mat under their tires for extra insurance, especially in the first few weeks after painting.
Repaint or Spot-Repair?
Deciding whether to repaint the entire garage or just do a spot-repair depends on the extent of the damage.
- Spot-Repair: Ideal for small, isolated areas of peeling, chipping, or damage. You can scrape away the affected area, re-clean, re-etch (if bare concrete is exposed), and apply new paint, blending it as best you can. This works well for minor fixes or if your original painted garage floor is otherwise holding up well.
- Repaint: If you have widespread peeling, cracking, or uniform wear across a significant portion of the concrete floor, a full repaint is usually the best approach. This involves stripping or grinding off the old coating (or at least aggressively cleaning and abrading it), then restarting the entire process from thorough prep work. It’s more effort but ensures a uniform, long-lasting fix.
When considering a spot-repair, remember that blending new paint into old can be tricky, especially with different batches or if the original color has faded. Sometimes, a full makeover is simply the most practical and satisfying long-term solution.
Maintenance After the Makeover
Congratulations! Your garage floor is looking fantastic. Now, the key is to keep it that way. Just like any investment, a little regular care goes a long way in ensuring your new epoxy flooring or painted garage floor stays holding up well and continues to look great for years. Neglecting maintenance can quickly lead to its demise, no matter how good the initial job was.
Weekly Sweep, Monthly Mop
Keeping your garage floor clean is the simplest and most effective maintenance step.
- Weekly Sweep: Use a soft-bristle broom or a leaf blower to regularly sweep away dirt, dust, and loose debris. Gritty particles can act like sandpaper underfoot and under car tires, slowly abrading your top coat over time. A quick sweep prevents this wear.
- Monthly Mop: For a deeper clean, especially if you notice spills or dirt buildup, mop your entire garage floor. Use a mop and a bucket with a suitable cleaner. This will refresh the surface and remove any embedded grime.
Regular cleaning prevents dirt from accumulating and becoming ingrained, which can make future cleaning harder and potentially damage the finish.
Safe Cleaners That Won’t Haze the Topcoat
Not all cleaners are created equal, especially when it comes to a finished garage floor. Using the wrong product can dull the high-gloss finish, leave a hazy film, or even degrade the epoxy or paint over time.
- Mild Detergents are Best: For general cleaning, a simple solution of warm water and a small amount of mild, pH-neutral detergent (like dish soap or a dedicated floor cleaner designed for sealed surfaces) is usually all you need. Mix it in a bucket and apply with a mop.
- Avoid Harsh Chemicals: Steer clear of abrasive cleaners, citrus-based cleaners, vinegar, or strong degreasers unless they are specifically labeled safe for epoxy flooring or painted concrete. These can react with the coating, causing hazing, discoloration, or even softening.
- Spot Cleaning: For oil or chemical spills, wipe them up immediately. For stubborn spots, use a soft cloth and a small amount of a safe cleaner. For instance, Rust-Oleum may have specific recommendations for their epoxy paint systems.
Always test any new cleaning product in an inconspicuous area first to ensure it doesn’t negatively affect your new paint.
When a Quick Second Coat Makes Sense
Even the most durable epoxy flooring will eventually show signs of wear, especially in high-traffic areas or where car tires frequently sit. You don’t necessarily have to repaint the entire garage when this happens.
- Spot Re-coating for Wear: If you notice localized thinning of the color, minor scratches, or areas where the texture has worn down (perhaps where you slide heavy items or turn your steering wheel while stationary), a spot second coat can make a difference.
- Refreshing the Topcoat: If the color still looks great but the high-gloss has dulled, or you want to enhance better durability, applying another clear coat (often a polyurethane or compatible poly on top) can revitalize the surface. This is less intensive than a full color re-application.
Before applying any touch-up or refreshing coat, always clean the area thoroughly and ensure it’s completely dry. Lightly sanding or scuffing the existing surface can also help the new paint bond to the concrete better, particularly if the original finish is very slick. Regular inspection of your painted garage floor will tell you when it’s time for a refresh.
Cost Breakdown & DIY vs Pro
Painting your garage floor can be a rewarding DIY project, but it’s smart to understand the costs and time involved. Deciding between doing it yourself or hiring a professional comes down to your budget, skills, and how much time you have. Let’s look at the costs and considerations for both.
Material Prices: Epoxy Kits, Etcher, Sealers
Most of your DIY cost will be for materials. Prices vary a lot based on product quality and your garage size.
- Epoxy Kits: For a high-quality 2-part epoxy system (like Rust-Oleum Epoxyshield or similar pro-grade kits), expect to pay around $300 to $700 for a standard two-car garage (about 400-500 square feet). This usually includes the base color and hardener. Some kits might also have color chips and a concrete etcher.
- Single-Part Garage Floor Paint: These are generally more affordable, ranging from $150 to $350 for the same size garage. They cost less upfront, but remember they’re less durable.
- Concrete Etcher & Degreaser: A standalone concrete etcher and a good degreaser will likely cost you between $20 and $80.
- Clear Topcoat/Sealer: If you add an extra clear coat (highly recommended for better durability), a gallon of high-quality clear polyurethane or epoxy concrete sealer might add another $100 – $200.
- Tools & Sundries: Don’t forget costs for rollers, brushes, mixing buckets, gloves, safety glasses, a scraper, paint brush, and possibly a pressure washer rental. This could add another $50 – $150 to your total.
Overall, for a DIY 2-part epoxy project on a standard two-car garage, you’re probably looking at material costs from $570 to $1,430. These are rough estimates and can change based on current market prices in the USA and your specific product choices.
Time Investment for Weekend DIY Projects
Painting your garage floor yourself is definitely a weekend job, but it often spills into two or even three weekends, especially when you factor in proper cure times.
Here’s a typical time breakdown:
- Clearing & Cleaning: A full day, maybe two if your garage is really full or dirty. This includes moving everything out, sweeping, degreasing, and the initial wash.
- Etching & Drying: Half a day for etching, but then at least 24-48 hours of dedicated drying time before you can paint. Don’t rush this part.
- Patching: A few hours for patching cracks or holes, plus extra cure time (can be 1-2 days).
- First Coat Application: Half a day for mixing (if using 2-part epoxy) and rolling the first coat.
- Drying Between Coats: Another 12-24 hours before you can apply the second coat.
- Second Coat Application: Half a day.
- Clear Coat Application (Optional): A few hours after the second coat has fully cured (another 12-24 hours).
- Foot Traffic Cure: 24-48 hours after the final coat.
- Vehicle Traffic Cure: This is the longest wait, typically 5-7 days (or even 10-14 days in cooler, humid conditions) for 2-part epoxy to fully harden before you can park your car garage.
So, while the active painting might only take a day or two, the entire project, including prep and crucial drying/curing times, means your garage will be unusable for well over a week. Keep this in mind for your DIY project.
Hiring a Pro: Labor Rates and Warranty Perks
If the time commitment or detailed prep work feels too much, hiring a professional for epoxy flooring installation is a good choice.
- Labor Rates: Professional installation in the USA can vary widely, but for a standard two-car garage, expect to pay anywhere from $1,500 to $5,000 or more. This includes all materials, labor, and specialized equipment. Costs depend on:
- The size of your garage.
- The condition of your existing concrete floor (more repairs mean higher cost).
- The type of coating (basic floor paint vs. high-end metallic epoxy flooring).
- The contractor’s experience and reputation.
- Warranty Perks: A big plus of hiring a pro is the warranty. Reputable contractors often offer warranties on their work, covering materials and labor for several years. This gives you peace of mind that if your painted garage floor starts to peel or fail due to installation issues, they’ll fix it at no extra charge. This is a big benefit compared to a DIY job where you’re responsible for any future problems.
- Expertise & Equipment: Professionals have industrial-grade equipment (like concrete grinders for better surface prep) and the experience to handle complex situations. This helps ensure the best results and maximum adhesion. They also understand how to work with specific conditions like temperature and humidity.
Ultimately, choosing between DIY and hiring a pro means balancing upfront savings against time, effort, and the assurance of a professional finish with a warranty. If you have the time and enjoy DIY projects, painting your garage floor can be very satisfying. If you prefer convenience, a guaranteed outcome, and a faster active work time, a pro might be worth the extra cost.
FAQs About Painting Your Garage Floor
It’s natural to have questions when you’re tackling a significant DIY project like painting your garage floor. Here, we answer some of the most common questions homeowners ask, giving you quick, direct answers to help clear up any confusion and ensure your project goes smoothly. Think of these as quick tips to keep your garage floor makeover on track.
Will epoxy bond to porous concrete?
Absolutely, epoxy is designed to bond to the concrete, and it actually prefers porous concrete! That’s why the prep work, especially using a concrete etcher, is so important. Etching opens up the pores of the concrete, creating a rougher, more receptive surface that allows the epoxy to penetrate deeply and form a strong, lasting mechanical bond. Without this step, even the best epoxy paint might struggle to adhere properly and could peel.
How long before car tires sit on the new paint?
Patience is key here. While your new paint might feel dry to the touch in 24-48 hours for foot traffic, allowing car tires to sit on it requires much longer. For most 2-part epoxy systems, you’ll need to wait at least 5-7 days before parking your vehicle. In cooler temperatures or high humidity, it can take even longer, up to 10-14 days, for the epoxy to fully cure and achieve maximum hardness. Rushing this step is a leading cause of hot tire pickup.
Can I use Rust-Oleum over old paint?
It depends on the old paint. Generally, Rust-Oleum (or any other epoxy paint brand) recommends applying their epoxy systems to bare concrete for the best results and longest adhesion. If your old paint is flaking or peeling, it must be removed entirely first. If the old paint is a well-adhered, non-epoxy floor paint, some Rust-Oleum products might bond to it after thorough cleaning and light sanding (scuffing). Always read the specific Rust-Oleum product instructions for recoating over existing finishes.
What happens if I skip etching?
Skipping the concrete etcher is one of the biggest mistakes you can make. If you don’t etch the bare concrete floor, the surface remains too smooth and non-porous. The epoxy or garage floor paint won’t be able to properly penetrate and bond to the concrete. This results in poor adhesion, and your new paint will likely peel and flake prematurely, often within months, especially under the stress of car tires and heavy use. Etching is a non-negotiable step for long-term durability.
Does temperature affect adhesion?
Yes, absolutely. Temperature and humidity play a critical role in the curing and adhesion of garage floor paint and epoxy. Most products have specific temperature ranges (e.g., between 50°F and 90°F) and humidity levels for optimal application and curing. Applying outside these ranges can lead to improper curing (tackiness), poor adhesion, or a weaker, less durable finish. Always check the manufacturer’s guidelines and plan your DIY projects for appropriate weather conditions.
Conclusion & Next Steps
Painting your garage floor is more than just a home improvement; it’s a makeover that adds significant value, functionality, and visual appeal to your property. From protecting against spills and stains to making cleaning a breeze, a well-applied epoxy or garage floor paint system transforms a dull concrete floor into a durable, attractive surface. Remember, the secret to longevity isn’t just the paint itself, but the meticulous prep work that underpins its adhesion.
If you’ve followed these steps, you’ve invested time and effort into a DIY project that will pay off for years. You’ve learned how to clean the concrete, etch its surface, fix cracks or holes, and apply the new paint with precision. You’ve also gained insight into why a 2-part epoxy often offers better durability than simpler floor paint when facing car tires and daily use.
As you step back and admire your shiny, resilient painted garage floor, you’ll realize it’s not just about aesthetics. It’s about creating a cleaner, more organized, and more enjoyable space for hobbies, projects, or simply parking your vehicles.
Quick Pre-Project Checklist
Before you start your own garage floor makeover, here’s a quick checklist to ensure you’re ready:
- Empty Garage: Is your entire garage clear of all items?
- Proper Ventilation: Do you have fans and open doors for good airflow?
- Tools & Materials: Have you gathered all your must-have gear and decided on any nice-to-have extras?
- Weather Check: Have you confirmed the temperature and humidity are within the product’s recommended range for the next few days?
- Read Instructions: Have you thoroughly read all manufacturer instructions for your chosen epoxy paint or floor paint, especially mixing ratios and cure times?
Taking the time for these checks will prevent headaches and help you achieve the best results.
Ready for More Home Improvements?
Your painted garage floor is a fantastic accomplishment! Now that your garage looks great, why stop there? Consider these next steps to further enhance your home:
- Looking for ways to keep that newly cleaned garage floor clear? Check out our guide on DIY Storage Upgrades to optimize your space and keep everything organized.
- Your garage door is the gateway to your beautifully transformed garage. Learn about essential Garage Door Maintenance tips to keep it operating smoothly and securely.
A beautiful garage isn’t just about parking; it’s about making the most of every square foot of your home. Enjoy your transformed space!