Organizing your garage can seem like a daunting task, especially when you have a plethora of tools, seasonal items, and miscellaneous junk scattered around. But fear not! Building your own garage shelves is an excellent solution to declutter and maximize your storage space. Not only does it help to keep things organized, but it also adds a sense of accomplishment when you see the results of your hard work.
In this comprehensive guide on how to build garage shelves, we will walk you through every step of the process. From planning and designing to cutting and assembling, you’ll have all the information you need to create sturdy and functional garage shelves. Let’s dive in!
Planning Your Garage Shelves
Assessing Your Storage Needs
Before you dive into the construction phase, it’s crucial to assess your storage needs. Take a good look at the items you plan to store. Are they heavy tools, lightweight seasonal decorations, or bulky sports equipment? Knowing what you need to store will help you decide on the type of shelves and the materials required.
Measuring Your Garage Space
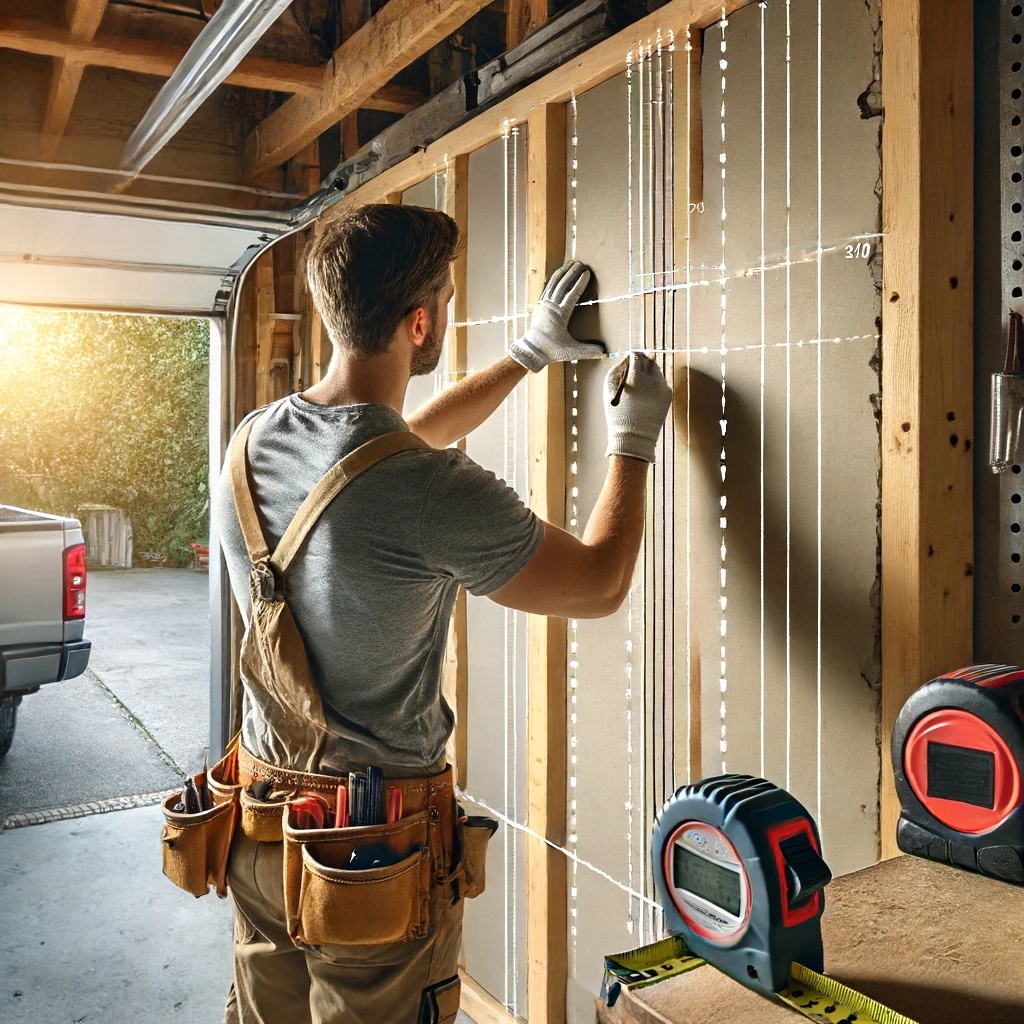
Next, measure the available space in your garage. Use a measuring tape to get the dimensions of the area where you plan to install the shelves. Consider the height, width, and depth to ensure that your shelves will fit perfectly without obstructing any doors or walkways.
Deciding on the Type of Shelves
There are various types of garage shelves to consider:
- Freestanding Shelves: These are versatile and can be moved around as needed.
- Wall-Mounted Shelves: Ideal for saving floor space and keeping items off the ground.
- Floating Shelves: Great for a minimalist look and easy to install.
- Custom Garage Shelving Systems: Tailored to fit your specific storage needs and space.
Choosing the right type will depend on your storage needs and the layout of your garage.
Also: Is it Cheaper to Buy or Build Garage Shelves?
Materials and Tools Required
Materials Needed
To build sturdy and long-lasting garage shelves, you’ll need the following materials:
- 2x4s: These will form the frame and supports for your shelves.
- Plywood: Typically used for the shelving surface. Choose a thickness that can support your items.
- Wood Screws: Essential for securing the frame and shelves.
- Wood Glue: Adds extra strength to the joints.
- Brackets: For additional support, especially for wall-mounted shelves.
You can purchase these materials at stores like Home Depot or your local lumber yard.
Tools Required
Having the right tools will make the building process much smoother:
- Circular Saw: For cutting the 2x4s and plywood to size.
- Miter Saw: Useful for making precise cuts at various angles.
- Drill: For driving screws and making pilot holes.
- Level: Ensures that your shelves are perfectly horizontal.
- Measuring Tape: For accurate measurements.
- Clamps: Helps hold pieces together while you work.
- Workbench: Provides a stable surface to work on.
I’ve compiled a list of all of the tools I use for my DIY projects. These are tools that have stood the test of time and I can confidently recommend them. Check them out here.
Designing Your Garage Shelves
Sketch a Design
Before you start cutting wood and assembling pieces, sketch a design of your garage shelves. A simple drawing can help you visualize the structure and make necessary adjustments before you begin. Include dimensions and note where each shelf will go. This step will help you stay organized and ensure that everything fits as planned.
Determine the Number of Shelves and Spacing
Decide how many shelves you need and how much spacing is required between each one. Consider the height of the items you plan to store. For example, if you’re storing taller items like bins and totes, you’ll need more space between shelves. On the other hand, for smaller items, you can place shelves closer together.
Consider Weight Capacity
When designing your shelves, it’s crucial to consider the weight capacity. Heavy-duty garage shelves need to support heavier items like power tools and equipment. Use thicker plywood and additional supports to ensure your shelves can handle the load. A general rule of thumb is to use 3/4-inch plywood for the shelves and reinforce them with brackets or additional 2x4s.
Types of Garage Shelves
Wall-Mounted Shelves
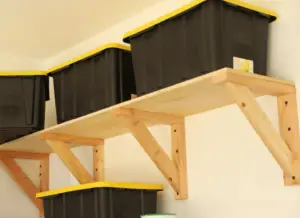
Wall-mounted shelves are a great option for saving floor space. They are mounted directly to wall studs, providing strong support for heavier items. Ensure you use sturdy brackets and secure the shelves properly to the wall. I have a full guide on how to build wall-mounted shelves in the garage. I recommend you check it out if that’s what you’re looking for.
Freestanding Shelves
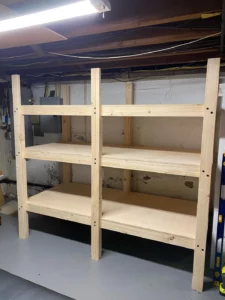

Freestanding shelves are versatile and can be moved around as needed. They are perfect for renters or those who might want to reconfigure their garage layout in the future. These shelves typically have a simple frame made of 2x4s and plywood shelves.
Floating Shelves


Floating shelves have a clean and minimalist look. They are mounted to the wall with hidden brackets, giving the appearance that they are “floating.” While they may not support as much weight as other types, they are perfect for lighter items and decorative storage.
Custom Garage Shelving Systems

For those with specific storage needs, custom garage shelving systems are the way to go. These systems can be tailored to fit your space and hold exactly what you need. Whether you need a combination of cabinets, drawers, and shelves, a custom system can provide the perfect solution.
Step-by-Step Instructions for Building Your Garage Shelves
Step 1: Cutting the Wood
How to Measure and Cut 2x4s and Plywood Pieces
Accurate measurements are key to building sturdy shelves. Measure the length of your 2x4s and mark the cutting lines with a pencil. Use a circular saw to make straight cuts. For the plywood sheets, measure the depth and width of each shelf and mark the cutting lines. A circular saw or a table saw can be used to cut the plywood to the desired size.
Safety Tips for Using Power Tools
When using power tools, safety should always be a priority. Wear safety goggles to protect your eyes from sawdust and debris. Use ear protection to safeguard your hearing. Always keep your hands away from the blade and use clamps to secure the wood while cutting. Follow the manufacturer’s instructions for each tool to avoid accidents.
Step 2: Assembling the Frame
How to Build the Frame Using Wood Screws and Wood Glue
Start by assembling the frame of your shelves. Lay out the 2x4s on a flat surface and align them according to your design. Apply wood glue to the joints for extra strength. Use wood screws to secure the pieces together. Ensure the frame is square by measuring the diagonals; they should be equal. Use a level to check that the frame is even.
Ensuring the Frame is Square and Level
A square and level frame is crucial for stable shelves. Measure the diagonals of the frame; if they are equal, the frame is square. Use a level to check that the frame is even on all sides. Adjust as necessary before proceeding to the next step.
Step 3: Attaching the Shelves
Securing the Plywood Sheets to the Frame
Once the frame is assembled, it’s time to attach the plywood shelves. Place the plywood sheets on top of the frame and align them properly. Use wood screws to secure the plywood to the 2x4s. Space the screws evenly to ensure the shelves are firmly attached.
Reinforcing with Additional Supports for Heavier Items
For heavier items, additional supports may be necessary. Add extra 2x4s under the shelves or use brackets to reinforce the structure. This will prevent sagging and ensure your shelves can hold a substantial amount of weight.
Step 4: Installing the Shelves in Your Garage
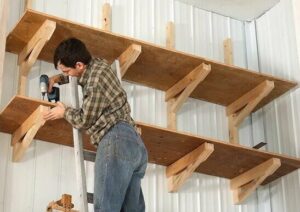
Tips for Securing Wall-Mounted Shelves to Wall Studs
If you’re building wall-mounted shelves, locating the wall studs is crucial for a secure installation. Use a stud finder to locate the studs and mark their positions. Drill pilot holes into the studs and use heavy-duty screws to attach the shelves. Ensure the shelves are level and securely fastened to the wall.
Positioning and Leveling Freestanding Shelves
For freestanding shelves, position them in your desired location and use a level to ensure they are even. Adjust the legs if necessary to stabilize the shelves. If you’re placing them against a wall, consider securing them with brackets to prevent tipping.
Customizing Your Garage Shelves
Adding Features Like Hooks, Bins, and Storage Containers
Customizing your garage shelves can significantly enhance their functionality. Adding hooks can provide easy access to frequently used tools and items. Bins and plastic storage containers are perfect for organizing smaller items and keeping them out of sight. Label the bins for quick identification.
Painting or Staining for a Finished Look
A coat of paint or stain can give your shelves a polished and professional appearance. Choose a color that complements your garage’s decor. Use a high-quality primer and paint or stain to protect the wood from moisture and wear. A finished look not only makes the shelves more attractive but also extends their lifespan.
Installing Additional Supports for Maximum Storage
If you plan to store very heavy items, consider installing additional supports. Reinforce the shelves with metal brackets or extra 2x4s. This will distribute the weight more evenly and prevent the shelves from bowing or sagging over time.
Advanced Customizations
Adding Cabinets and Drawers
How to Incorporate Cabinets into Your Shelving Unit
Incorporating cabinets into your shelving unit can provide closed storage for items you want to keep out of sight. You can purchase pre-made cabinets and attach them to your shelves or build custom cabinets yourself. Use sturdy materials and secure the cabinets properly to the frame.
Building Drawers for Smaller Items
Drawers are perfect for storing smaller items like screws, nails, and other hardware. You can build custom drawers to fit your shelving unit. Use drawer slides for smooth operation and ensure the drawers are sturdy enough to hold the contents. Label the drawers for easy identification.
Creating a Workbench
Integrating a Workbench into Your Shelving System
A workbench can be a valuable addition to your garage shelving system. Designate a section of your shelves as a workbench area. Use a thick, sturdy piece of plywood for the work surface. Ensure the workbench is at a comfortable height for working. Add drawers or shelves underneath for tool storage.
Tips for a Sturdy and Functional Workbench
To create a sturdy workbench, use thick plywood and reinforce the frame with extra supports. Consider adding a vise or clamps for holding materials in place while you work. Install pegboards or tool racks above the workbench for easy access to tools.
Maintenance and Safety
Regular Maintenance Tips to Keep Your Shelves in Good Condition
Regular maintenance can extend the life of your garage shelves. Here are some tips:
- Inspect for Damage: Periodically check for any signs of wear or damage.
- Tighten Screws: Ensure all screws are tight and secure.
- Clean Regularly: Dust and clean the shelves to keep them looking good.
- Repaint or Restain: Touch up paint or stain as needed to protect the wood.
Safety Considerations for Heavy-Duty Garage Shelves
Safety is paramount when it comes to heavy-duty garage shelves. Here are some safety tips:
- Secure to Wall Studs: Ensure wall-mounted shelves are securely fastened to wall studs.
- Distribute Weight Evenly: Avoid placing too much weight on one shelf; distribute it evenly.
- Use Proper Supports: Reinforce shelves with brackets or additional supports for heavy items.
- Avoid Overloading: Be mindful of the weight capacity and avoid overloading the shelves.
Inspecting Shelves Periodically for Any Wear and Tear
Regular inspections can help you catch any issues before they become major problems. Look for signs of wear, such as sagging shelves, loose screws, or damaged wood. Address any issues promptly to maintain the integrity of your shelves.
Conclusion
Building your own garage shelves is a rewarding and practical project that can transform your garage into a well-organized space. With the right planning, materials, and tools, you can create sturdy and functional shelves that meet your storage needs. Whether you choose wall-mounted, freestanding, or custom shelves, the satisfaction of completing a DIY project is unmatched.
We hope this guide on how to build garage shelves has provided you with all the information you need to get started. Happy building!
FAQs
What is the best wood for garage shelves?
The best wood for garage shelves is typically 2×4 lumber for the frame and 3/4-inch plywood for the shelves. These materials are strong and durable, making them ideal for supporting heavy items. For a more in-depth guide, check out my article on the best types of wood for garage shelves.
How much weight can DIY garage shelves hold?
The weight capacity of DIY garage shelves depends on the materials used and the construction. Properly built shelves with 2x4s and 3/4-inch plywood can hold several hundred pounds, especially if reinforced with brackets.
Can I build garage shelves without power tools?
While power tools make the job easier and quicker, it is possible to build garage shelves without them. You can use hand saws, screwdrivers, and a hammer, but be prepared for a more labor-intensive process.
How do I secure shelves to wall studs?
To secure shelves to wall studs, use a stud finder to locate the studs and mark their positions. Drill pilot holes into the studs and use heavy-duty screws to attach the shelves. Ensure the shelves are level and securely fastened.
What are some quick garage organization tips?
Some quick garage organization tips include:
- Declutter first: Get rid of items you no longer need.
- Use clear bins: Store items in clear bins for easy identification.
- Label everything: Labels make it easy to find items quickly.
- Utilize vertical space: Install wall-mounted storage solutions to free up floor space.