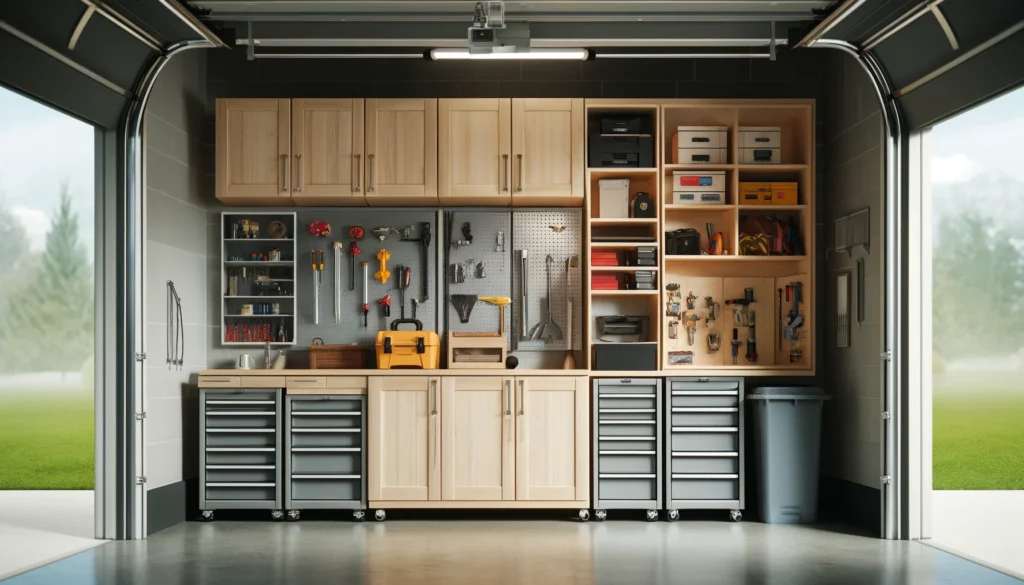
Garage cabinets are essential for maintaining an organized and functional garage space. They offer numerous benefits, from optimizing storage space to enhancing the overall aesthetics of your garage. Whether you need a place to store tools, sports equipment, or other household items, installing garage cabinets can transform your cluttered garage into a well-organized haven. This comprehensive step-by-step guide will walk you through everything you need to know about how to install garage cabinets, ensuring a smooth and successful installation process.
Benefits of Installing Garage Cabinets
1. Space Optimization: Garage cabinets help you make the most of your available space by providing designated storage areas for various items. This reduces clutter and frees up valuable floor space for other uses.
2. Improved Organization: With dedicated storage solutions like garage cabinets, you can easily categorize and store your belongings. This makes it easier to find what you need when you need it, saving you time and frustration.
3. Enhanced Aesthetics: Installing garage cabinets not only improves functionality but also enhances the overall look of your garage. A well-organized and visually appealing garage can increase the value of your home.
4. Increased Safety: By storing tools and hazardous materials in cabinets, you can keep them out of reach of children and pets, reducing the risk of accidents.
5. Increased Home Value: Another indirect benefit of installing garage cabinets is that it increase the value of your home. For a more in-depth explanation, check out my article on how garage cabinets increase home value.
In the following sections, we will cover the tools and materials needed for cabinet installation, the planning and preparation process, a detailed step-by-step guide, tips and tricks for a successful installation, and how to maximize your garage storage space. Let’s get started!
Tools and Materials Needed for Installing Garage Cabinets

Before you begin installing garage cabinets, it’s essential to gather all the necessary tools and materials. Having everything you need on hand will make the installation process smoother and more efficient.
Essential Tools
- Stud Finder: Used to locate wall studs for secure cabinet installation.
- Level: Ensures that cabinets are installed straight and level.
- Drill: Required for drilling holes and driving screws.
- Screws: Necessary for attaching cabinets to the wall and securing adjacent cabinets.
- Shims: Used to adjust and level cabinets during installation.
- Tape Measure: For measuring dimensions and ensuring accurate placement.
- Pencil: For marking measurements and stud locations.
- Safety Gear: Gloves and safety goggles to protect yourself during installation.
Materials Required
- Garage Cabinets: Choose the type of cabinets that best suit your needs. Options include metal cabinets, plywood cabinets, and unfinished cabinets.
- Plywood: Used for backing or additional support if needed.
- Ledger Board: Provides temporary support for upper cabinets during installation.
- Countertop: If installing base cabinets, a countertop may be required.
- Screws and Anchors: For securing cabinets to the wall and each other.
Safety Gear
- Gloves: Protect your hands from sharp edges and splinters.
- Safety Goggles: Shield your eyes from dust and debris.
Having the right tools and materials is crucial for a successful cabinet installation. In the next section, we’ll discuss the planning and preparation steps to ensure your garage cabinet installation goes smoothly.
Planning Your Garage Cabinet Installation
Proper planning and preparation are key to a successful garage cabinet installation. Before you start drilling into your walls, take the time to assess your garage space, decide on the layout, and prepare the area. This will ensure a smooth installation process and help you avoid common pitfalls.
Assessing Your Garage Space
1. Measure Your Space: Use a tape measure to determine the dimensions of your garage. Measure the height, width, and depth of the area where you plan to install the cabinets. This will help you choose the right size and number of cabinets for your space.
2. Identify Obstacles: Look for any obstacles that might interfere with the installation, such as electrical outlets, switches, or garage door tracks. Make a note of their locations so you can plan around them.
3. Plan for Clearance: Ensure there’s enough clearance for cabinet doors to open fully and for you to move around comfortably. Consider the placement of other items in your garage, like vehicles, bicycles, or workbenches.
Deciding the Layout
H3: Choosing the Right Cabinets
1. Types of Cabinets: There are various types of garage cabinets to choose from, including metal cabinets, plywood cabinets, and unfinished cabinets. Each type has its own advantages and considerations:
- Metal Cabinets: Durable and easy to clean, metal cabinets are ideal for heavy-duty storage. They’re resistant to moisture and pests, making them a long-lasting choice.
- Plywood Cabinets: Plywood cabinets are sturdy and can be customized with paint or finishes to match your garage decor. They are a versatile option for those who want a more personalized look.
- Unfinished Cabinets: These cabinets are a blank canvas, allowing you to finish them to your liking. They are often more affordable and can be customized to suit your needs.
2. Cabinet Features: Consider additional features like cabinet doors, countertops, and shelving. Cabinet doors can help keep items out of sight and protected from dust, while countertops provide a useful workspace.
3. Layout Options: Decide on the placement of upper cabinets, base cabinets, and storage cabinets. A common layout includes upper cabinets for lighter items and base cabinets for heavier tools and equipment.
Preparing the Garage
1. Clear the Area: Remove any items from the area where you plan to install the cabinets. This will give you ample space to work and prevent any damage to your belongings.
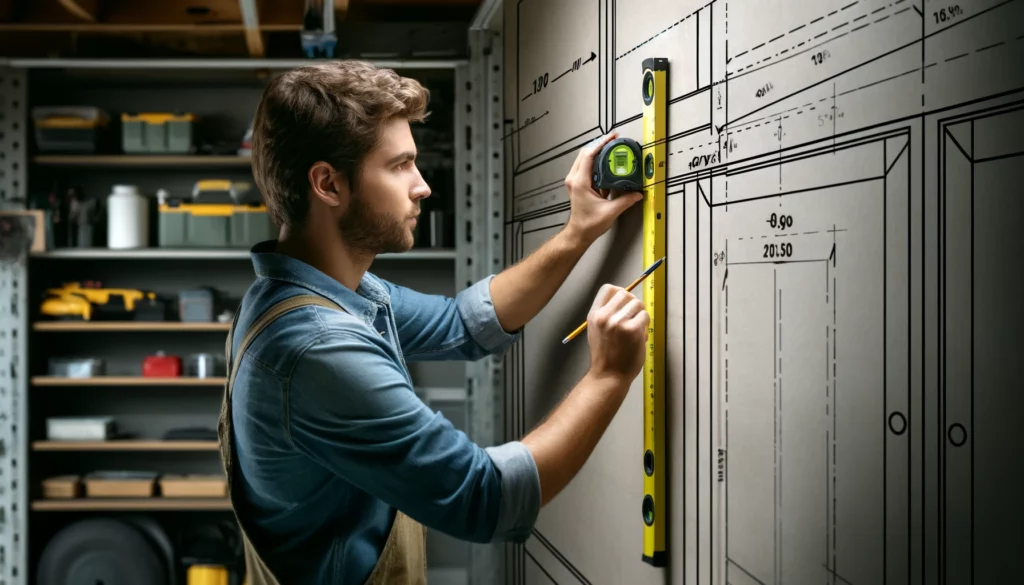
2. Mark a Level Line: Use a level and a pencil to mark a level line on the wall where the top of the cabinets will be installed. This will serve as a guide during the installation process.
3. Locate Wall Studs: Use a stud finder to locate the wall studs in the area where you plan to install the cabinets. Mark the stud locations with a pencil. Studs provide the necessary support for securing the cabinets to the wall.
4. Gather Tools and Materials: Ensure all the tools and materials you need are within reach. This includes your cabinets, screws, drill, level, shims, and safety gear.
By thoroughly planning and preparing, you’ll set yourself up for a successful garage cabinet installation. In the next section, we’ll dive into the step-by-step installation process.
Step-by-Step Guide to Install Garage Cabinets
Now that you have your tools and materials ready and have planned out your space, it’s time to start the installation process. Follow these steps carefully to ensure your garage cabinets are installed securely and properly.
Locating the Wall Studs
- Use a Stud Finder: Begin by using a stud finder to locate the wall studs in the area where you want to install your cabinets. Studs are crucial for securing your cabinets as they provide the necessary support.
- Mark the Stud Locations: Once you locate a stud, mark its location with a pencil. Repeat this process to identify and mark all the studs along the wall.
Installing the Ledger Board
- Purpose of a Ledger Board: A ledger board acts as a temporary support for upper cabinets during installation. It helps keep the cabinets level and in place until they are securely fastened to the wall.
- Attach the Ledger Board: Position the ledger board on the wall, aligning it with the level line you marked earlier. Use screws to fasten the ledger board to the wall studs. Make sure it is level before securing it fully.
Installing the Upper Cabinets

- Remove the Cabinet Doors: To make the cabinets lighter and easier to handle, remove the cabinet doors. This will also prevent any damage to the doors during installation.
- Position the Cabinets: With the help of a second set of hands, lift the upper cabinets and place them on the ledger board. Ensure they are aligned with the wall studs.
- Fasten the Cabinets: Use screws to attach the cabinets to the wall studs. Start with the top or bottom of the cabinet and work your way along the studs. Make sure the cabinets are plumb and level before fully securing them.
- Secure Adjacent Cabinets: If installing multiple cabinets, secure adjacent cabinets to each other using screws. This will provide additional stability.
Installing the Base Cabinets
- Position the Base Cabinets: Place the base cabinets in their intended locations. Use a level to ensure they are even and adjust as needed using shims.
- Secure the Base Cabinets: Fasten the base cabinets to the wall studs using screws. If the cabinets are adjacent to each other, secure them together as well.
- Install the Countertop: Place the countertop on top of the base cabinets. Make sure it is level and secure it using screws or adhesive as needed.
Final Adjustments and Finishing Touches
- Reattach Cabinet Doors: Once the cabinets are securely fastened, reattach the cabinet doors. Ensure they open and close smoothly.
- Install Shelves: If your cabinets include adjustable shelves, install them at your desired heights.
- Use Shims for Adjustments: If any cabinets are not perfectly level, use shims to make final adjustments.
- Apply Finishes: If you have unfinished cabinets, now is the time to paint or apply finishes to match your garage decor.
By following these steps, you can successfully install garage cabinets and create a more organized and functional garage space. In the next section, we’ll provide some tips and tricks to ensure a smooth installation process.
Also: Custom vs Prefab Cabinets: Which is Right for You?
Tips and Tricks for a Smooth Garage Cabinet Installation
Even with a detailed step-by-step guide, there are always additional tips and tricks that can make the installation process easier and more efficient. Here are some expert recommendations to help you achieve a flawless garage cabinet installation.
Importance of Having a Set of Hands
Installing garage cabinets can be a two-person job, especially when lifting and positioning upper cabinets. Having an extra set of hands can make the process smoother and safer.
Lifting heavy cabinets alone can lead to injuries. Collaborate with a friend or family member to distribute the weight and reduce the risk of accidents.
Common Pitfalls and How to Avoid Them
1. Uneven Walls or Floors: Garages often have uneven walls or floors, which can make installation challenging. Use shims to level the cabinets and ensure they sit flush against the wall. 2. Incorrect Measurements: Double-check all measurements before drilling or cutting. Accurate measurements are crucial for a seamless installation. 3. Misaligned Cabinets: Always use a level to make sure your cabinets are aligned properly. Misaligned cabinets can affect the functionality and appearance of your storage system.
Using a Level to Make Sure Everything is Aligned Properly
1. Consistent Leveling: Throughout the installation process, consistently use a level to check the alignment of your cabinets. This will ensure that all cabinets are installed straight and level. 2. Mark Level Lines: Marking level lines on the wall before installation provides a visual guide to keep your cabinets aligned.
Handling Uneven Walls or Floors
1. Use Shims: Shims are essential for adjusting and leveling cabinets on uneven surfaces. Place shims behind the cabinets or under the base cabinets to achieve a level installation. 2. Custom Fit: In some cases, you may need to custom cut pieces of plywood to fit behind the cabinets and compensate for uneven walls.
Final Touches for a Professional Finish
1. Caulking Gaps: Once the cabinets are installed, use caulk to fill any gaps between the cabinets and the wall. This creates a seamless and professional look. 2. Touch-Up Paint: If there are any scratches or blemishes on the cabinets, use touch-up paint to fix them. This will give your cabinets a polished appearance.
Additional Tips
1. Pre-Drill Holes: Pre-drilling holes for screws can prevent the wood from splitting and make it easier to drive the screws in. 2. Use Quality Hardware: Invest in high-quality screws and anchors to ensure your cabinets are securely fastened to the wall. 3. Label Parts: If your cabinets come in multiple pieces, label each part to avoid confusion during assembly.
By following these tips and tricks, you can overcome common challenges and ensure a smooth and successful garage cabinet installation. In the next section, we’ll explore how to maximize your garage storage space for optimal organization.
Maximizing Your Garage Storage Space

Once your garage cabinets are installed, the next step is to make the most of your newly organized space. Effective organization can transform your garage into a highly functional area, making it easier to find and access your tools, equipment, and other items. Here are some strategies to help you maximize your garage storage space.
Utilizing Wall Space
1. Install Pegboards: Pegboards are an excellent way to utilize vertical space. They provide a versatile solution for hanging tools, gardening equipment, and other items. Pegboards can be customized with hooks, shelves, and bins to suit your storage needs.
2. Use Open Wall Space: Take advantage of any open wall space by installing shelves or hooks. This can be particularly useful for storing items like bicycles, ladders, and sports equipment. Wall-mounted storage racks are also a great option for keeping bulky items off the floor.
3. Magnetic Strips: Install magnetic strips on the wall to hold metal tools and accessories. This keeps frequently used items within easy reach and frees up drawer space.
Tool Storage and Organization
1. Categorize Tools: Group similar tools together and store them in designated areas within your cabinets. For example, keep all your screwdrivers in one drawer and wrenches in another. This makes it easier to find what you need quickly.
2. Use Drawer Organizers: Invest in drawer organizers or dividers to keep small tools and accessories neatly arranged. This prevents items from getting lost or tangled.
3. Label Everything: Label shelves, drawers, and bins to clearly identify where each item belongs. This not only helps you stay organized but also makes it easier for others to find and return items to their proper place.
Maintaining an Organized and Functional Garage
H3: Maintaining an Organized and Functional Garage
1. Regular Maintenance: Schedule regular maintenance and cleaning sessions to keep your garage organized. This includes dusting shelves, wiping down cabinets, and sweeping the floor.
2. Seasonal Organization: Rotate seasonal items to the front of your storage area as needed. For example, keep snow shovels and winter gear accessible during the winter months, and switch them out for gardening tools in the spring.
3. Efficient Use of Floor Space: Keep the floor as clear as possible by using wall-mounted storage solutions and cabinets. This not only maximizes your available space but also makes it easier to move around and work in your garage.
4. Evaluate and Declutter: Periodically evaluate the items in your garage and get rid of anything you no longer need or use. This prevents clutter from building up and ensures you have enough space for essential items.
Additional Storage Solutions
1. Overhead Storage Racks: Make use of the garage’s ceiling space by installing overhead storage racks. These are perfect for storing items that you don’t need to access frequently, such as holiday decorations or seasonal sports equipment.
2. Rolling Carts: Invest in rolling carts for a flexible storage solution. These can be moved around as needed and provide additional workspace when required.
3. Modular Storage Systems: Consider using modular storage systems that can be customized and expanded as your needs change. These systems offer a high degree of flexibility and can be tailored to fit your specific storage requirements.
By implementing these organization strategies, you can maximize your garage storage space and create a functional, efficient, and clutter-free environment. In the next section, we’ll address some frequently asked questions about garage cabinet installation.
Frequently Asked Questions about Garage Cabinet Installation
Installing garage cabinets can raise several questions, especially if you are new to DIY projects. Here are some of the most frequently asked questions about garage cabinet installation, along with detailed answers to help you navigate any challenges you may encounter.
What Type of Cabinets Are Best for a Garage?
The best type of cabinets for a garage depends on your specific needs and preferences. Here are some options to consider:
- Metal Cabinets: These are highly durable and resistant to moisture, making them suitable for garages that may experience fluctuating temperatures and humidity levels. They are also easy to clean and maintain.
- Plywood Cabinets: Plywood cabinets offer a balance of strength and customization. They can be painted or finished to match your garage decor and are generally more affordable than metal cabinets.
- Unfinished Cabinets: These are a cost-effective option that allows you to customize the finish to your liking. Unfinished cabinets can be painted, stained, or left as is, depending on your preference.
How Do I Ensure My Cabinets Are Level?
Ensuring your cabinets are level is crucial for both functionality and aesthetics. Here are some steps to make sure your cabinets are level:
- Use a Level: Consistently use a level throughout the installation process to check the alignment of your cabinets.
- Mark Level Lines: Before installation, use a pencil and level to mark level lines on the wall. These lines will serve as a guide to keep your cabinets aligned.
- Use Shims: If your walls or floors are uneven, use shims to adjust and level the cabinets. Place shims behind the cabinets or under the base cabinets as needed.
Can I Install Cabinets in My Garage by Myself?
While it is possible to install cabinets in your garage by yourself, having an extra set of hands can make the process easier and safer. Here are some considerations:
- Upper Cabinets: Installing upper cabinets can be challenging due to their weight and the need for precise alignment. Having someone to help lift and hold the cabinets in place while you secure them can be very beneficial.
- Base Cabinets: Base cabinets are generally easier to install on your own, but assistance can still be helpful for positioning and leveling.
- Safety: Lifting heavy cabinets alone can lead to injuries. Collaborating with a friend or family member can help distribute the weight and reduce the risk of accidents.
What Should I Do If I Can’t Find Wall Studs?
If you have difficulty locating wall studs, here are some steps you can take:
- Double-Check: Use a stud finder to double-check the wall and ensure you haven’t missed any studs.
- Alternate Anchors: If studs are not available in the desired locations, use heavy-duty wall anchors designed to support the weight of your cabinets. Make sure to choose anchors that are rated for the weight of the cabinets and their contents.
- Add Support: Consider installing a horizontal support board (ledger board) across the wall. This board can be secured to the studs and provide additional support for the cabinets.
How Do I Secure Cabinets to the Wall?
Securing cabinets to the wall is a critical step in the installation process. Here’s how to do it:
- Locate Studs: Use a stud finder to locate and mark the wall studs.
- Pre-Drill Holes: Pre-drill holes in the back of the cabinet where they will align with the studs. This makes it easier to drive the screws and prevents the wood from splitting.
- Use Screws: Use high-quality screws to secure the cabinets to the wall studs. Start with the top or bottom of the cabinet and work your way along the studs.
- Check Alignment: Continuously use a level to ensure the cabinets are plumb and level as you secure them.
By addressing these frequently asked questions, you can overcome common challenges and ensure a successful garage cabinet installation. In the next section, we’ll provide a conclusion to wrap up the guide.
Conclusion
Installing garage cabinets is a highly rewarding project that can significantly enhance the functionality and aesthetics of your garage space. By following this comprehensive step-by-step guide, you can confidently tackle the installation process and create a well-organized and efficient garage storage system.
Whether you’re a seasoned DIY enthusiast or a beginner, this guide provides all the information you need to successfully install garage cabinets. From gathering the right tools and materials to following detailed installation steps and utilizing tips and tricks, you have everything you need to create an organized and functional garage space.
Once your cabinets are installed, maintaining an organized garage is essential. Regular cleaning and decluttering will keep your garage looking neat and ensure that your storage system remains efficient. Remember to make use of wall space, categorize your tools, and periodically evaluate your storage needs to keep your garage in top shape.
“A well-organized garage is not just about aesthetics; it’s about creating a space where you can work efficiently and safely.” – Home Improvement Expert
By investing time and effort into installing garage cabinets, you are not only enhancing the functionality of your garage but also adding value to your home. Enjoy the benefits of a clutter-free, organized, and visually appealing garage space.
This concludes our comprehensive guide on how to install garage cabinets. We hope you find this information valuable and that it helps you achieve a well-organized and functional garage space. If you have any questions or need further assistance, feel free to reach out or explore our additional resources.
Thank you for reading, and happy installing!