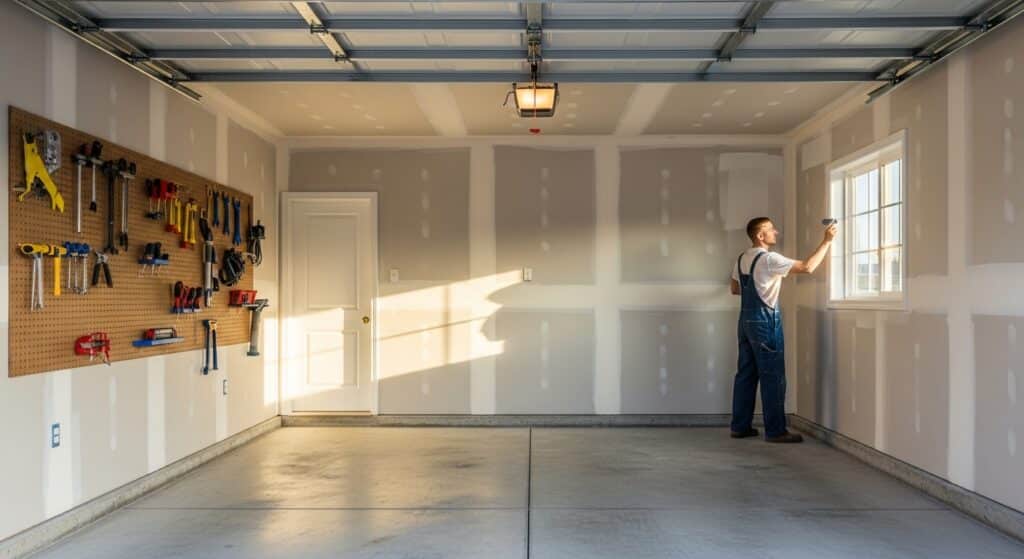
Saturday morning, coffee in hand, you glance at those drab drywall panels and think, “One fresh coat could change everything.” You’re not wrong! Painting your garage walls isn’t just about aesthetics; it’s a practical upgrade that saves you money in the long run, transforms your garage space, and is a project you can absolutely tackle on a weekend.
This guide will walk you through how to paint garage walls effectively, from preparation to the final stroke, ensuring a durable and attractive finish. Get ready to upgrade your garage!
Why Bother Painting Garage Walls?
You might think a garage is just for parking cars and storing junk. But imagine a bright, clean, and organized workspace. Painting your garage walls does more than just make it look good; it offers significant practical benefits.
First, painting garage walls provides a crucial layer of protection for your drywall or concrete. Garages are exposed to a lot: moisture from rain, humidity, chemical splashes, oil, grease, and general wear.
An unpainted surface, especially drywall, can absorb moisture. This often leads to mold and mildew. Concrete, while tougher, can still absorb spills, leaving tough stains. A good coat of garage wall paint seals these surfaces, making them resistant to moisture and simpler to clean. Think of it as a shield for your garage interior.
Second, a fresh coat of paint dramatically brightens the space. Garages are often dimly lit, which can make working on projects difficult and even unsafe.
Lighter paint colors reflect light, making the garage feel larger and more inviting. This also greatly improves visibility. Better lighting helps you see clearly, whether you’re working on a car, a woodworking project, or just finding something on a shelf.
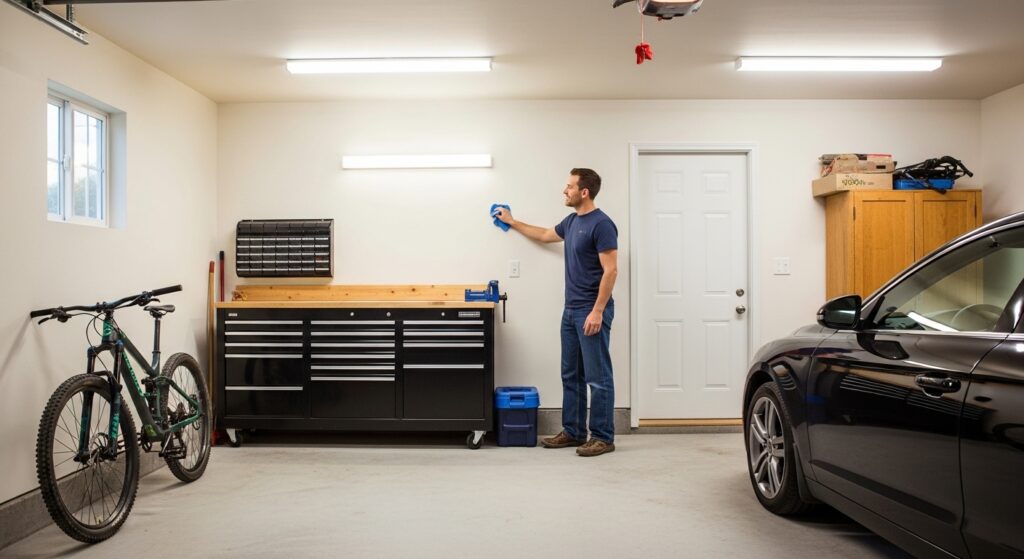
Beyond the immediate benefits, painting your garage walls can also boost your home’s resale value and curb appeal. A clean, well-maintained garage signals to potential buyers that the entire home has been cared for. It transforms the garage from a mere storage area into a functional extension of your living space.
Finally, and most practically, painted surfaces are much easier to wipe clean. Spills, dust, and grime don’t soak into the surface; they sit on top. You can wipe them away with a damp cloth, keeping your garage looking tidy with minimal effort. This makes routine cleaning a breeze, ensuring your garage always looks its best.
Tools & Materials Checklist
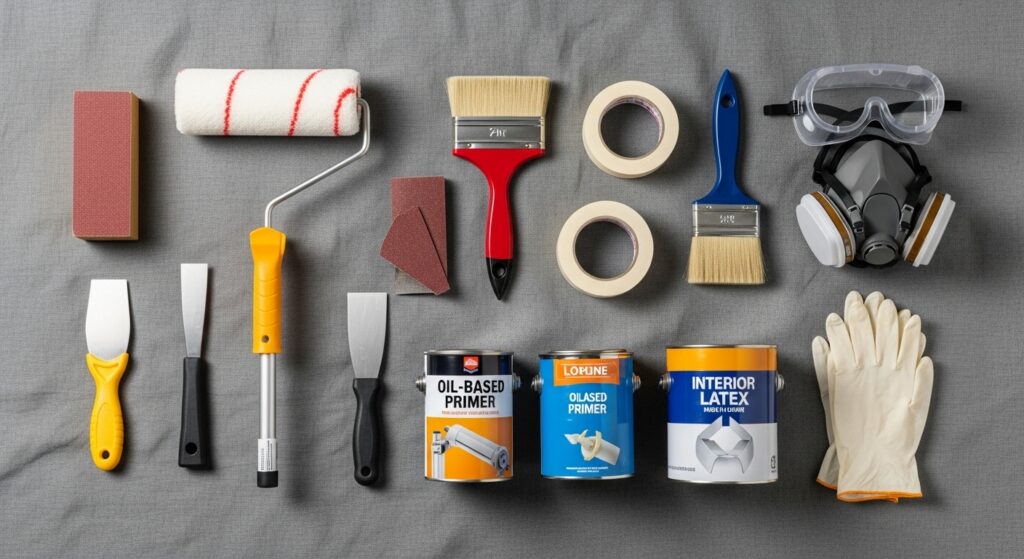
Before you paint your garage, gathering all your tools and materials is a smart move. A quick trip to the hardware store for these items will save you multiple trips later. Here’s what you’ll need for a successful painting garage walls project:
Essential Supplies:
- Drop cloths or tarps: Protect your garage floor, workbench, and anything else you don’t want painted. Canvas drops are reusable and less slippery than plastic.
- Painter’s tape: For clean lines around trim, windows, and garage doors. Look for tape designed for delicate surfaces if your trim is freshly painted.
- Shop vac, stiff brush, scrub pads: For thorough cleaning of your garage walls before painting. A shop vac is especially useful for dust.
- Dish soap, degreaser, bucket: Essential for tackling grease and grime on the walls. Simple water and dish soap often work wonders, but a dedicated degreaser helps with tougher spots.
- Repair supplies:
- Joint compound: For filling larger holes or repairing drywall seams.
- Putty knife: To apply joint compound smoothly.
- Sanding block: For smoothing patched areas.
- Drywall tape (if you have new drywall seams to finish).
- Primer: Don’t skip this!
- Oil-based primer: Ideal for covering stains, previously painted surfaces, or unfinished garage walls that might bleed through.
- Drywall primer: Specifically designed for new drywall to seal it and ensure the paint adheres evenly.
- Paint: Choosing the best paint for garage walls is key.
- Interior latex paint: A popular choice for garage walls due to its easy cleanup and quick drying time.
- Oil-based paint: Offers superior durability and resistance to grease, but requires more ventilation and paint thinner for cleanup.
- Applicators:
- Paint roller (⅜”–½” nap): A paint roller with a medium nap is a good choice for applying garage wall paint evenly to most wall surfaces.
- Angled brush: For “cutting in” around edges, corners, and trim.
- Extension pole: Attaches to your roller for reaching high spots without a ladder.
- Paint tray: For holding paint when using a roller.
- Ladder: For reaching high sections of the wall and the ceiling if you decide to paint the ceiling too.
- Safety gear:
- Gloves: Protect your hands from paint and chemicals.
- Goggles: Shield your eyes from drips or splashes.
- Respirator: Crucial, especially when using oil-based paint or oil-based primer, to protect your lungs from fumes.
Having everything laid out and ready to go will make the entire process of painting your garage walls much smoother and more enjoyable.
Safety First & Workspace Prep
Before you begin painting your garage walls, taking a few moments for safety and proper workspace preparation is time well spent. This isn’t just about avoiding a mess; it’s about protecting yourself and making the paint job go smoothly.
First, ventilation and respirator use are non-negotiable, especially when you’re applying primer or oil-based paint, or using paint thinner. Garages aren’t always well-ventilated, and paint fumes can be strong and harmful. Open garage doors and windows wide. Use fans to create a cross-breeze. A good quality respirator designed for paint fumes will protect your lungs from inhaling harmful volatile organic compounds (VOCs). Your health is far more important than rushing the project.
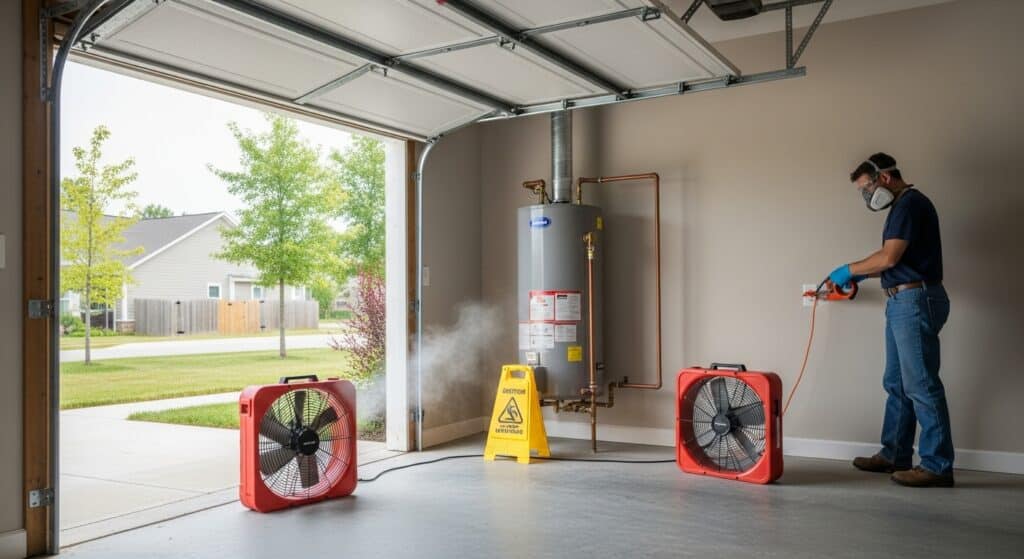
Next, turning off gas appliances and covering outlets is crucial. If you have a water heater, furnace, or any other gas-powered appliance in your garage, turn off their pilot lights or gas supply. Paint fumes, especially from oil-based products, are flammable. A spark from an appliance or an uncovered outlet could be dangerous. Use painter’s tape to cover all electrical outlets and light switches to prevent accidental splatters and ensure safety.
Finally, setting up lights so shadows don’t hide missed spots will make a huge difference in the quality of your paint job. Garages can have tricky lighting, and shadows can easily conceal unpainted areas or imperfections. Bring in portable work lights or position existing lights to illuminate the entire wall you’re working on.
This way, you’ll achieve an even coverage and a professional-looking finish. It’s frustrating to finish a section, only to find missed spots once the light hits it differently. Proper lighting helps you see exactly where the paint adheres and where it needs another pass.
Step 1 – Inspect, Patch, and Sand
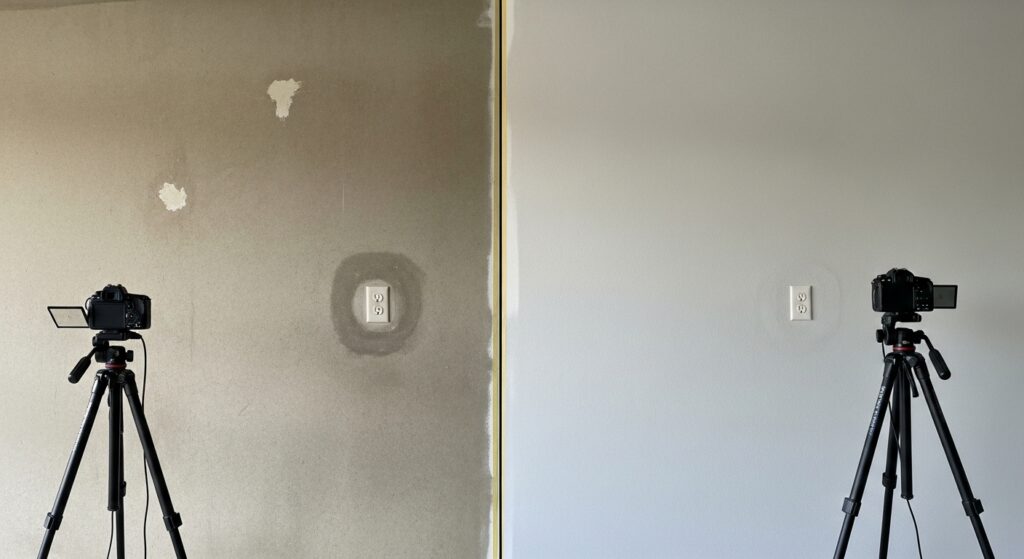
Before you even think about opening a can of paint, the first crucial step to painting garage walls is preparing the surface. This means a thorough inspection, followed by patching and sanding. Neglecting this step is a common mistake that leads to a less-than-perfect paint job, even with the best paint for garage walls.
Start by inspecting every inch of your garage wall. Look closely for any imperfections: small nail pops, hairline cracks, dents from stray basketballs, or even signs of mildew. Pay special attention to areas around outlets, switches, and the bottom of the wall where it meets the floor. If you have new drywall installed, you’ll need to check for properly finished seams. An unfinished garage with exposed drywall requires even more scrutiny for imperfections or unfinished areas that need attention.
Once you’ve identified all the problem spots, it’s time to patch. For small nail holes or minor dents, a quick-drying spackle or joint compound is perfect. Apply it with a putty knife, ensuring it fills the void completely. For larger cracks or significant damage, you might need a bit more compound, applied in thin layers to prevent cracking as it dries. If you’re dealing with new drywall seams, make sure they are taped and have a smooth, even layer of joint compound over them.
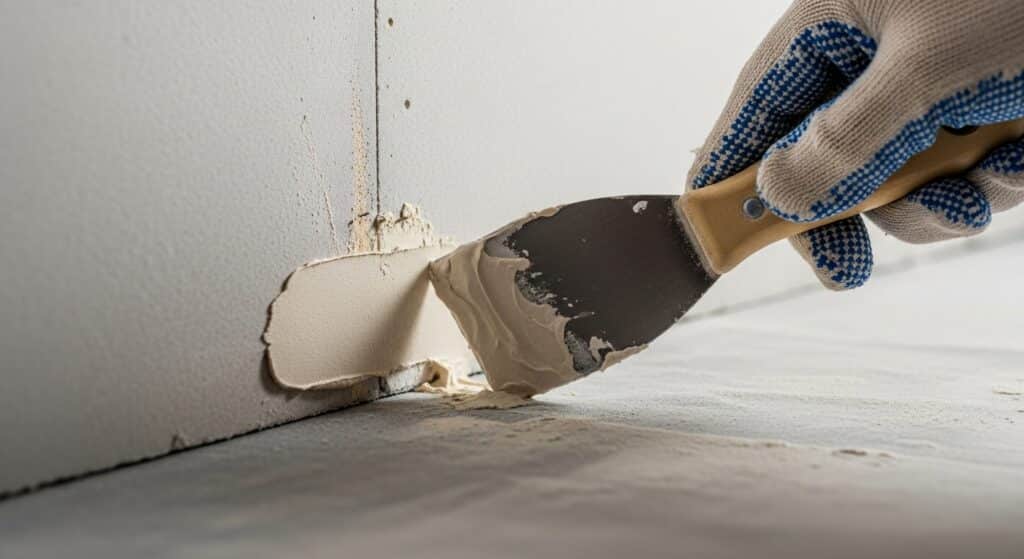
After the patching material has dried completely—follow the manufacturer’s recommendations for drying times—it’s time to sand. Use a sanding block with medium-grit sandpaper (around 120-150 grit) to smooth out any patched areas. The goal here is to create a seamless transition between the patched spot and the rest of the drywall.
Run your hand over the sanded area; it should feel perfectly smooth. This critical step ensures even coverage when you begin painting and prevents bumps or rough patches from showing through your fresh coat.
Finally, after sanding, you’ll have a fine layer of dust covering your walls. It’s essential to wipe dust with a damp cloth before moving on. This step removes any sanding residue, ensuring the primer and paint adhere properly to the wall, creating a clean, durable surface for your new paint. If you skip this, dust can get trapped under the paint, leading to a gritty finish or even adhesion issues down the line. A clean surface is paramount for a professional-looking paint job.
Step 2 – Clean the Walls Thoroughly
Before any paint touches your garage walls, a deep clean is in order. This step is just as important as patching because paint won’t properly adhere to dirty, greasy, or dusty surfaces. Skipping this can lead to peeling or bubbling later, and nobody wants to redo a paint job!
Remove Grease and Stubborn Stains
Your garage sees a lot of action, and with that comes grime. You’ll likely find grease spots, oil splatters, and other stubborn stains, especially if it’s in a car garage or near a workbench. These “hotspots” need special attention.
Start by mixing warm water and dish soap in a bucket. This simple solution is surprisingly effective for general dirt and grime. Using a soft sponge or scrub brush, scrub the walls from the bottom up. Working from the bottom prevents dirty water from streaking down already cleaned areas. Pay extra attention to any marks or scuffs.
For tougher spots, particularly the grease and oil stains common in a car garage or near active work areas, a dedicated degreaser is your best friend. Spray the degreaser onto the stain, let it sit for a few minutes as per product instructions, then scrub vigorously with a stiff brush or scrub pad. You might be surprised at how much-hidden grime comes off!
After scrubbing, it’s crucial to rinse the walls thoroughly. Use clean water and a clean sponge or cloth to wipe away all soap and degreaser residue. Any leftover residue can prevent the paint from adhering properly. Once rinsed, allow the walls to dry completely.
This is a non-negotiable step. Painting over damp walls can lead to mildew growth under the paint or adhesion issues. Depending on humidity levels, this could take several hours. You want your garage walls before painting to be bone dry and spotless. Using fans can help speed up the drying process. A truly clean surface is the foundation for a lasting, fresh coat of paint.
Step 3 – Protect Floors, Doors, and Fixtures
You’ve patched, sanded, and cleaned. Now, before that first drop of paint hits the garage wall, it’s absolutely critical to protect everything you don’t want painted. This step, while seemingly tedious, saves a tremendous amount of cleanup time and frustration later. Trust me, drips happen, and you don’t want them on your nice garage floor or your brand-new workbench.
Start by laying drop cloths or tarps. These are your first line of defense against errant drips and spills. Cover the entire garage floor, extending it a few feet away from the walls. If you have any items stored in the garage that can’t be moved, cover those as well. Canvas drop cloths are a popular choice as they are less slippery than plastic and more durable for multiple painting projects.
However, even heavy-duty plastic sheeting will do the job of protecting your concrete floors. The goal is to protect your garage floor completely, so you don’t end up with permanent paint marks.
Next, grab your painter’s tape. This is where precision pays off. Carefully tape around garage doors, window frames, light switches, electrical outlets, and any trim that you don’t plan to paint. Press the tape down firmly along the edges to create a crisp, clean line and prevent paint from seeping underneath. Take your time here; a well-taped edge is the hallmark of a professional-looking paint job. If you’re also planning to paint the ceiling, remember to tape off the top edge of the wall where it meets the ceiling.
Finally, consider any other fixtures or permanent installations. If you have built-in shelving, workbenches, or large cabinets, either move them away from the walls or cover them thoroughly with drop cloths. You can also temporarily remove light fixtures and outlet covers to get a cleaner finish, but if you do, remember to turn off the power at the breaker first for safety.
By taking these protective measures, you create a dedicated painting zone, allowing you to focus on getting a beautiful fresh coat of paint on your garage walls without worrying about unintended messes. This preparation ensures that when you’re done painting the walls, the cleanup is minimal, and the result is sharp.
Step 4 – Prime the Walls Right the First Time
Priming is one of the most overlooked, yet critical, steps when you paint your garage walls. Think of primer as the glue between your wall surface and your new paint. It creates a uniform surface, seals porous materials, and ensures your paint adheres properly, leading to a more durable and attractive paint job. Skipping this step is a recipe for disappointment, as your paint might not stick, or you could end up with an uneven finish.
Choosing Primer
Selecting the right primer depends heavily on the condition and type of your garage walls before painting.
- Oil-based primer for old, previously painted, or stained walls: If your garage walls have been painted before, or if they have any lingering stains from water damage, smoke, or grease, an oil-based primer is the way to go. This type of primer excels at blocking stains from bleeding through your fresh coat of paint. It also provides excellent adhesion over glossy or chalky surfaces, which can be common in older garages. Oil-based primer is a robust choice that ensures the paint adheres firmly, even on challenging surfaces.
- Drywall primer for new drywall to prevent the paint from soaking: If you’re dealing with new drywall in an unfinished garage, a dedicated drywall primer (often latex-based) is essential. New drywall is incredibly porous, and if you apply paint directly, it will soak right in unevenly, leading to a splotchy finish and requiring many extra coats of paint. Drywall primer seals the surface, creating a smooth, non-absorbent base. This allows your subsequent coat of paint to lay down evenly and achieve full color depth with fewer applications. It’s designed to prevent the paint from soaking in too much, giving you a better final appearance.
Application Tips
Once you’ve got the right primer, applying it correctly is next.
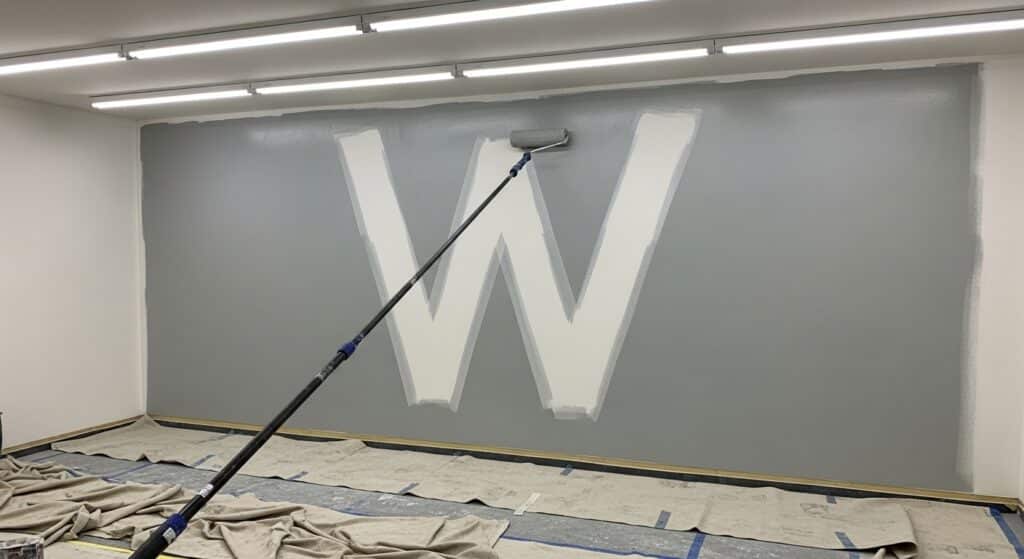
- Cut in edges, then use a roller for even coverage: Just like with paint, start by using an angled brush to “cut in” around the edges of the walls, corners, trim, and around the garage doors. Apply a strip of primer about 2-3 inches wide. After cutting in, switch to your paint roller with an extension pole. Load the roller evenly and apply the primer in vertical sections, using “W” or “M” strokes to ensure even coverage across the entire wall. Overlap your strokes slightly to avoid roller marks.
- Allow recommended drying hours before paint: This is crucial. Every primer product will have specific drying times listed on the can, usually between 1-4 hours. Do not rush this step. Applying paint over wet or tacky primer can lead to peeling, bubbling, or an uneven finish. Patience here pays off immensely, ensuring your paint adheres properly and your paint job lasts. Once the primer is fully dry, your garage walls will be perfectly prepped and ready for paint.
Step 5 – Pick the Best Paint for Garage Walls
Choosing the right type of paint for your garage walls is a pivotal decision that impacts both the look and durability of your paint job. Not all paints are created equal, especially when considering the unique demands of a garage environment. The goal is a finish that will last and is easy to clean.
Finish Options
The sheen, or finish, of your garage paint, affects its appearance, durability, and how easy it is to wipe clean.
- Semi-gloss: This is often the top recommendation for garage walls. Semi-gloss paint offers a noticeable shine that reflects light beautifully, helping to brighten the space. More importantly, it’s incredibly easy to wipe clean. Spills, dirt, and even grease can often be wiped away with a damp cloth, making it ideal for a high-traffic area where spills are common. Its durability means it stands up well to the wear and tear of a busy garage.
- Eggshell or satin: These finishes offer a softer sheen than semi-gloss, providing a more subtle look while still being quite washable. They don’t reflect light as much as semi-gloss, which can be a good choice if you prefer a less reflective surface. While not quite as durable as semi-gloss for scrubbing, they are still a good choice for garage walls that might see less direct abuse. Flat paint is generally not recommended for garages, as it scuffs easily and is difficult to clean effectively.
Color Choice
The paint color you choose can dramatically alter the feel of your garage.
- Light gray or off-white to reflect light: These are popular choices for a reason. Lighter colors help maximize the natural and artificial light in your garage, making it feel larger, brighter, and more inviting. This improved visibility is crucial for safety and for any projects you might tackle. A light gray can hide minor imperfections better than pure white.
- Avoid pure white if the garage is high-traffic: While pure white is the ultimate light reflector, it shows every smudge, scuff, and stain. If your garage is a busy workspace with frequent vehicle traffic or DIY projects, pure white might quickly look dingy. An off-white or light gray offers similar brightening benefits without the constant need for touch-ups.
Latex vs. Oil-Based
The base of your paint affects its application, cleanup, and overall properties.
- Latex-based paint dries faster, has low odor, and has simple cleanup. Interior latex paint is a fantastic choice for garage walls. It’s water-based, meaning it dries quickly, often within a few hours, allowing you to apply multiple coats in a single day. It has a low odor, making the painting process more pleasant, especially in a relatively enclosed space like a garage. Cleanup is a breeze—brushes and rollers can be washed with warm water and soap. Latex paints are also flexible and resist cracking.
- Oil-based paint is durable but needs paint thinner for cleanup. Oil-based paint is known for its exceptional durability and hardness once cured. It creates a very tough finish that is highly resistant to abrasion, moisture, and stains, which can be beneficial for a garage paint option. However, it takes much longer to dry, usually requiring overnight drying between coats. It also emits strong fumes, necessitating excellent ventilation and a respirator. Cleanup requires paint thinner or mineral spirits, making it less convenient than latex. While durable, oil-based paint is becoming less common for general interior walls due to its drawbacks, it remains a viable option for specific high-wear areas or for painting garage doors. For most homeowners, interior latex paint is recommended for garage walls due to its balance of performance and ease of use.
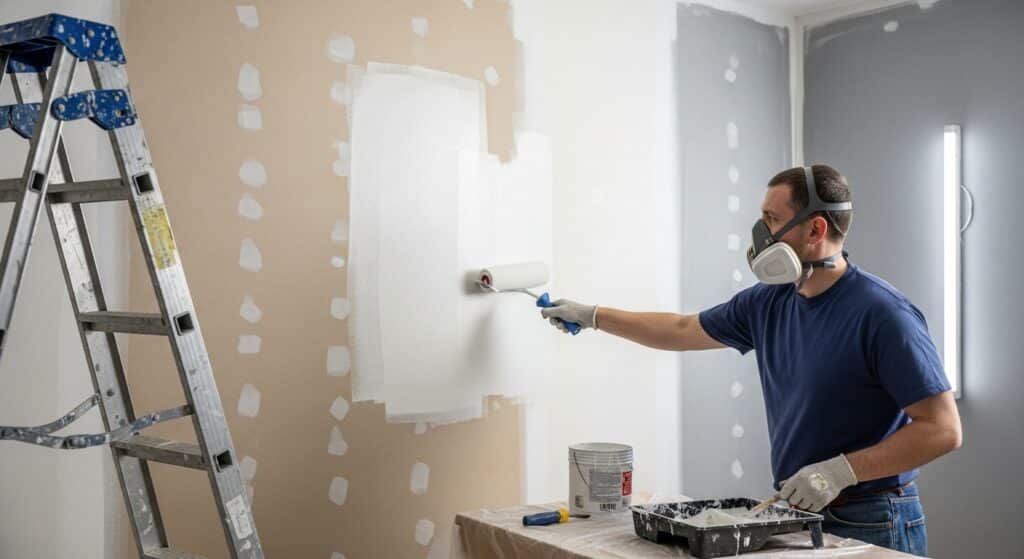
Step 6 – Start Painting Like a Pro
With your garage walls prepped and primed, it’s finally time for the fun part: applying that fresh coat of paint! This is where your careful preparation pays off, allowing the paint to adhere smoothly and evenly. Here’s how to start painting like an experienced painter.
First, cut in around the edges and corners with a brush. This means using your angled brush to paint a neat, clean line where the wall meets the ceiling, adjacent walls, trim, and around the garage doors. Dip about an inch or two of your brush bristles into the paint, tap off any excess, and use a steady hand. Apply a consistent line of paint about 2-3 inches wide. This “cutting in” provides a boundary for your roller and ensures you get paint into areas the roller can’t reach. It’s a precise task, so take your time and don’t overload your brush.
Once your edges are cut in, grab your paint roller and extension pole. This is how you’ll cover the main areas of the entire wall. Load your roller evenly with paint from your paint tray. The key is to use a roller in “W” strokes for even coverage across the entire wall. Instead of rolling straight up and down, begin by rolling a “W” shape on the wall, then fill in the empty spaces within that “W” with vertical strokes. This technique helps distribute the paint evenly and prevents visible roller marks.
As you work, maintain a wet edge to avoid lap marks. This means always working into the wet paint you’ve just applied, rather than letting an area dry completely before overlapping it. If you allow the paint to dry, you might see noticeable lines where the new paint overlaps the old, creating “lap marks.” By keeping a wet edge, the paint blends seamlessly, resulting in a smooth, uniform paint job.
Finally, work top to bottom to catch drips. Gravity is real, and paint drips happen. By working from the top of the wall downwards, any drips or runs will fall into the wet paint below, where you can easily roll them out.
If you started at the bottom, drips from above would run over your freshly painted, potentially dry surface, creating unsightly streaks that are harder to fix. Following these steps helps ensure your paint adheres properly and that your painting of your garage walls project looks professional.
Step 7 – Second Coat and Touch-Ups
You’ve applied the first coat of paint to your garage walls, and it’s starting to look good! But for the best durability and color depth, a second coat is almost always necessary, especially for a high-traffic area like a garage. This step is about refining your paint job for a professional, lasting finish.
First, wait for the full manufacturer’s dry time before applying the second coat. This is not a suggestion; it’s a rule. Most latex paints will feel dry to the touch in an hour or two, but they need more time to fully cure and adhere properly before another layer is applied. Rushing this step can lead to bubbling, peeling, or an uneven finish. Check the paint can for the recommended recoat time, which can range from 2 to 4 hours, or even longer for oil-based paint. Patience here ensures the paint adheres properly and lasts for years.
Once the first coat is completely dry, take a moment to lightly sand glossy spots; wipe dust. Sometimes, even with careful application, you might find a few slightly raised or glossy areas, particularly if the paint went on a bit thick in one spot. A very light sanding with a fine-grit sanding block (220-grit or higher) can smooth these imperfections. Don’t press hard; just a gentle pass is enough. After sanding, use a damp cloth to wipe away any dust, ensuring the surface is clean for the next application. This helps the subsequent coat of paint lay down smoothly and seamlessly.
Finally, it’s time to apply the fresh coat of paint for full-color depth. Just like the first coat, start by cutting in the edges and corners with your brush, then use your paint roller for the main wall areas. Apply the second coat with the same “W” pattern and technique you used for the first, ensuring even coverage.
The second coat will deepen the color, hide any minor inconsistencies from the first coat, and significantly boost the paint’s durability and washability—essential qualities for garage wall paint. Two coats provide the necessary protection against the wear and tear your garage might experience, giving you a beautiful finish that will last.
Step 8 – Cleanup and Proper Disposal
Congratulations, your garage walls are painted! Now comes the often-dreaded, but necessary, cleanup. Proper cleanup not only preserves your tools but also ensures environmental responsibility.
First, wash brushes and rollers. If you used latex-based paint, cleanup is straightforward: simply rinse your brushes and rollers thoroughly with warm water and dish soap until all paint residue is gone. You can use a paint comb to help work the paint out of the brush bristles. For oil-based paint, you’ll need paint thinner or mineral spirits. Pour a small amount into a bucket, swish your brushes and rollers, then wipe them clean with a rag. Repeat this process until the tools are clean, then finish with soap and water if desired. Proper cleaning extends the life of your tools, saving you money on future painting projects.
Next, it’s time to peel the tape at a 45-degree angle before the paint cures. This is a small but critical detail for crisp lines. If you wait until the paint is fully hardened, the tape can pull off flakes of your new paint, ruining your perfect edges. Gently pull the painter’s tape back at a 45-degree angle, pulling away from the painted surface. This technique helps ensure a clean break between the painted wall and the protected trim or garage doors.
Finally, reinstall outlet covers and hardware. Once the paint is completely dry and safe to touch, carefully reattach all electrical outlet covers, light switch plates, and any other hardware you removed before painting. Take a moment to admire your handiwork!
When it comes to disposal, never pour paint or paint thinner down drains. For leftover latex paint, you can often leave the lid off the can in a well-ventilated area to allow the paint to dry out and solidify. Once solid, it can usually be disposed of with regular household trash (check local regulations).
For oil-based paint or paint thinner is considered hazardous waste and must be taken to a designated household hazardous waste collection site. Your local sanitation department or recycling center can provide information on proper disposal in your area. Responsible cleanup completes your paint job and protects the environment.
Common Mistakes to Avoid
Even with a detailed plan for how to paint garage walls, it’s easy to make common mistakes. Knowing these can save you headaches and ensure a better paint job.
Skipping primer is a frequent and costly error. Primer isn’t optional, especially for new drywall or stained walls. Without it, your paint won’t adhere well, leading to uneven color or peeling. You’ll use more paint for a worse result.
Painting over grease is another critical mistake. If you don’t thoroughly clean the walls and remove all grease, the paint simply won’t stick. It will chip or peel. Remember, paint adheres best to a clean, dry surface.
Using flat paint that scuffs easily is not recommended. Garages are high-traffic areas. Flat paint shows every scuff, dent, and stain. It’s also hard to clean. Stick to satin, eggshell, or semi-gloss for durability and easy cleaning.
Ignoring temperature and humidity limits can ruin your paint job. Paint products have specific ranges for application and drying. Extreme temperatures or high humidity can affect how the paint adheres, dries, and cures. Always check the paint can for environmental guidelines.
Maintenance Tips to Keep Walls Looking Fresh
You’ve put effort into painting your garage walls. A little ongoing care will keep that fresh coat of paint looking great for years.
Monthly dust-down with a shop vac brush attachment is a good habit. Garages collect dust quickly. A quick pass with a shop vac helps remove dust before it builds up. This keeps your garage wall paint bright and clean.
Spot-clean spills quickly with mild soap. Accidents happen. Most spills can be wiped away with a cloth and water, and dish soap. Don’t let stains dry, as they become much harder to remove.
Re-coat high-traffic areas every 3–5 years. Some parts of your garage see more wear and tear, like walls behind workbenches or near garage doors. Consider giving these spots a new coat of paint every few years. This prevents major wear and keeps your garage paint looking consistently fresh.
Frequently Asked Questions
Even after going through the steps, you might have some lingering questions about painting garage walls. Here are some common queries to help you get started and tackle any tricky situations.
Can I paint over previously painted garage walls without priming?
It’s tempting to skip the primer, especially if your garage walls are already painted. However, it’s often advisable to prime, especially if the old paint is glossy, oil-based, stained, or in poor condition. If the existing paint is durable, clean, and similar in color, and you’re using a high-quality interior latex paint specifically designed for good adhesion over existing finishes, you might get away with it. But for the best paint for garage walls and a long-lasting paint job, a light sanding followed by a coat of appropriate primer (like an oil-based primer for glossy surfaces or stain blocking) will always yield a superior result and ensure the paint adheres properly.
What’s the best paint color for a dim garage?
For a dim garage space, light colors are your best friend. Light gray or off-white are excellent choices because they reflect the most light, making the space feel larger and brighter. Pure white can be effective but shows dirt more easily. Avoid dark colors, as they absorb light and will make the garage feel smaller and even darker. The goal is to maximize the existing light for a more functional and inviting garage interior.
How long should I wait between coats?
Always follow the manufacturer’s recommendations on the paint can. For most latex-based paint, the recoat time is typically 2 to 4 hours. For oil-based paint, it can be much longer, often 12-24 hours. Applying a new coat of paint too soon can lead to bubbling, peeling, or an uneven finish, as the previous coat hasn’t fully cured. Patience ensures a durable fresh coat of paint.
Does exterior paint work inside a garage?
While exterior paint is durable, it’s generally not recommended for garage walls that are part of the interior of your home. Exterior paint is formulated to withstand harsh weather, UV rays, and temperature extremes, but it often contains different additives that can release stronger fumes (higher VOCs) for a longer period, which aren’t ideal for an enclosed indoor space like a garage.
Interior paint, specifically durable interior latex paint, is designed for indoor conditions, offering good washability and lower odor. Use the type of paint that matches the environment.
How do I handle mold or mildew before painting?
You must address mold or mildew before you begin painting. Don’t just paint over it, as it will continue to grow and eventually cause your paint to peel. Scrub the affected areas with a solution of one part bleach to three parts water, or a specialized mold cleaner. Wear gloves and eye protection.
Rinse thoroughly with clean water and allow the wall to dry completely. If the mold is extensive, you might need professional remediation. Once the area is dry and mold-free, consider using an oil-based primer designed for stain-blocking and mildew resistance before applying your fresh coat of paint.
Will the paint peel if the garage is unheated?
An unheated garage might experience more temperature fluctuations, but paint peeling is usually due to improper surface preparation or using the wrong type of paint. If the walls were properly cleaned and primed (especially if dealing with moisture issues), and a durable paint is durable (like a good quality latex or even oil-based paint) was applied, it should hold up well. Ensure proper ventilation during application and drying, even in an unheated space, to help the paint cure effectively.
Is spraying faster than using a roller?
Yes, using a paint sprayer can be significantly faster for covering large areas, especially the entire wall. However, spray painting requires more setup time (extensive masking and covering everything to prevent overspray), a learning curve to avoid drips and uneven application, and a thorough cleanup of the sprayer.
For most DIYers painting garage walls, a paint roller combined with an extension pole offers a good balance of speed, control, and ease of use, leading to an excellent paint job without the complexities of spraying.
Can I paint a cinder block or brick with the same method?
Yes, the general steps for painting the walls of cinder block or brick are similar but with some key differences. Cleaning is even more critical due to their porous nature. You’ll need a masonry primer (often an alkali-resistant primer) specifically designed to seal these materials and prevent efflorescence (salt deposits).
For the paint, look for a latex-based paint formulated for masonry or concrete, as it will provide better adhesion and flexibility on these surfaces. You might also need a thicker nap paint roller to get into all the crevices of the block or brick for even coverage.
Quick-Answer Box
How to Paint Garage Walls in 8 Steps
- Repair and sand: Fix any holes or cracks, then smooth the surface.
- Clean the walls: Remove all dirt, dust, grease, and stubborn stains.
- Cover floor and fixtures: Lay drop cloths and use painter’s tape to protect everything you don’t want to be painted.
- Prime the walls: Apply the correct primer (drywall or oil-based primer) to seal the surface and ensure the paint adheres properly.
- Pick interior latex or oil-based paint: Choose a durable type of paint with an appropriate finish like semi-gloss or satin.
- Cut in edges, then roll: Use a brush for edges and a paint roller for large wall areas, maintaining a wet edge.
- Apply a second coat after drying: Wait the recommended time, then apply a fresh coat of paint for full color and durability.
- Clean up tools and tape: Wash tools and carefully peel off tape before the paint fully cures.
Conclusion
You embarked on a journey to transform your garage space, and now you stand amidst the results of your effort. Painting garage walls is more than just a home improvement project; it’s a significant upgrade that pays dividends. You’ve learned how to paint garage walls step-by-step, from initial inspection and meticulous cleaning to proper priming and applying that final, perfect coat of paint.
The benefits are clear: a brighter, more inviting workspace that makes DIY projects safer and more enjoyable. Your newly painted garage walls now boast enhanced protection against moisture, grime, and the daily wear and tear of a busy car garage. And, perhaps best of all, maintaining that clean, fresh look will be far easier thanks to your choice of durable, easy-to-clean paint.
So, step back and appreciate your achievement. Your garage is no longer just a place to park; it’s a vibrant, functional extension of your home. We’d love to see your progress!
Have you recently given your garage a fresh look? Share your before-and-after photos in the comments below! Or perhaps you encountered a tricky situation when painting your garage walls and have a question? Ask away – our community is here to help!